
 Pin it
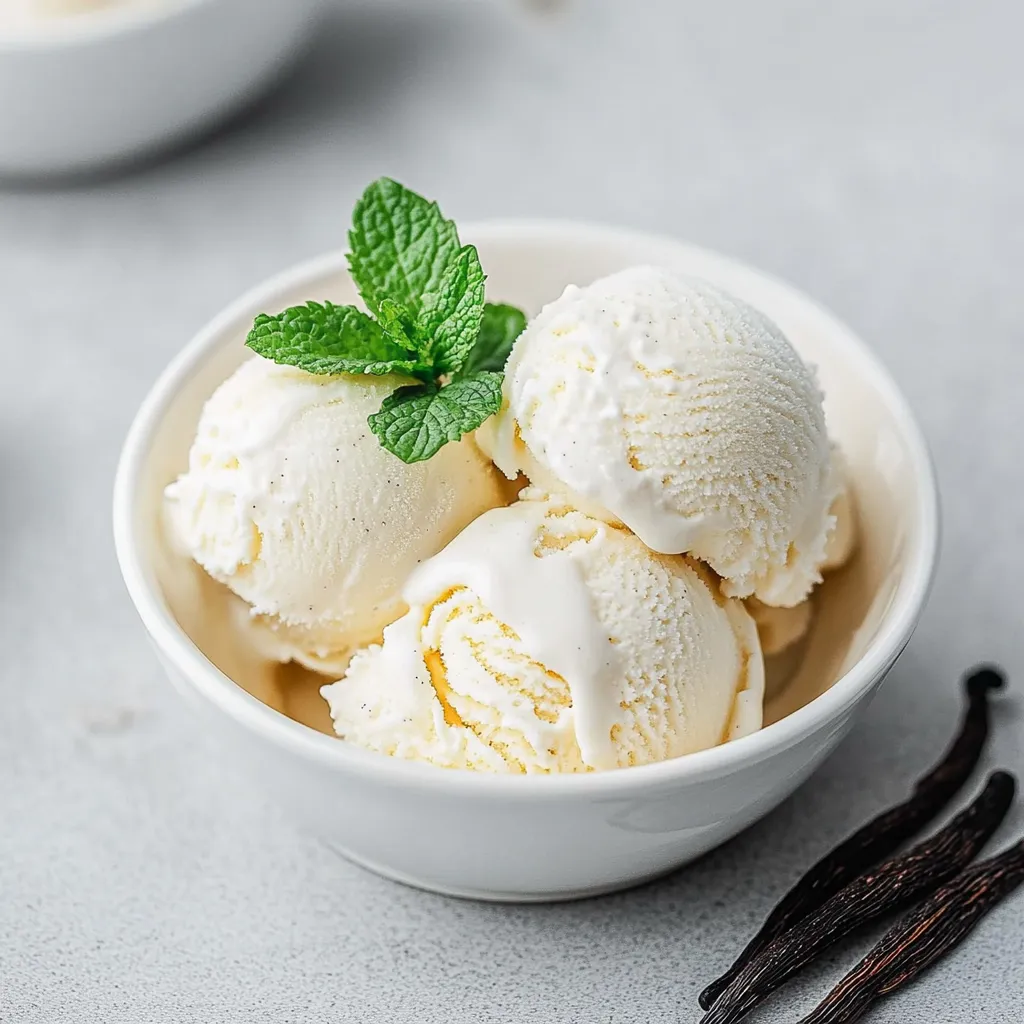
Velvety smooth homemade vanilla ice cream requires no special equipment yet delivers luxurious taste and texture that rivals premium store brands. This no-churn recipe transforms just four simple ingredients into a sumptuous frozen treat that outshines commercially produced options. The natural vanilla bean infuses the cream with authentic flavor notes and distinctive specks that signal real vanilla quality in every spoonful.
I first stumbled upon this technique during a summer cabin vacation when my ice cream craving hit but specialized equipment was miles away. What began as a desperate experiment became my signature dessert. My grandchildren now request "Nana's special vanilla" rather than store-bought brands when they visit.
Superior Ingredients Selection
- Heavy Whipping Cream: Creates the luxurious base and airiness. Select cream with higher fat content (36-40%) for optimal richness and smoother freezing properties.
- Sweetened Condensed Milk: Provides sweetness and prevents crystallization. Look for brands without additional fillers or stabilizers for purest flavor.
- Real Vanilla Bean: Delivers authentic flavor impossible to replicate. Madagascar beans offer classic rich vanilla profile with subtle floral notes.
- Fine Sea Salt: Enhances flavor depth and balances sweetness. A small pinch makes remarkable difference in the final taste profile.
Creation Method
- Cream Whipping Stage:
- Begin with thoroughly chilled equipment and ingredients. Pour cold heavy cream into a large mixing bowl and beat with electric mixer at medium-high speed. Continue whipping for precisely 4-5 minutes until stiff peaks form that hold their shape firmly when the beater is lifted. The cream should be thick enough to stand up in soft mountains but not so stiff that it appears curdled or grainy.
- Flavor Base Development:
- Prepare the sweetened base by combining condensed milk with a small pinch of sea salt in a separate bowl. Carefully split the vanilla bean lengthwise using a sharp paring knife. Scrape out the tiny black seeds with the knife edge, collecting all the precious vanilla specks. Add these directly to the condensed milk mixture and stir thoroughly to distribute the vanilla seeds evenly throughout the mixture.
- Gentle Incorporation Process:
- Transfer the whipped cream into the vanilla-infused condensed milk mixture using a rubber spatula. Work in three separate additions, folding with deliberate downward strokes and upward turns. This technique preserves the air whipped into the cream while ensuring complete integration. Continue until no white streaks remain but avoid overmixing which deflates the mixture.
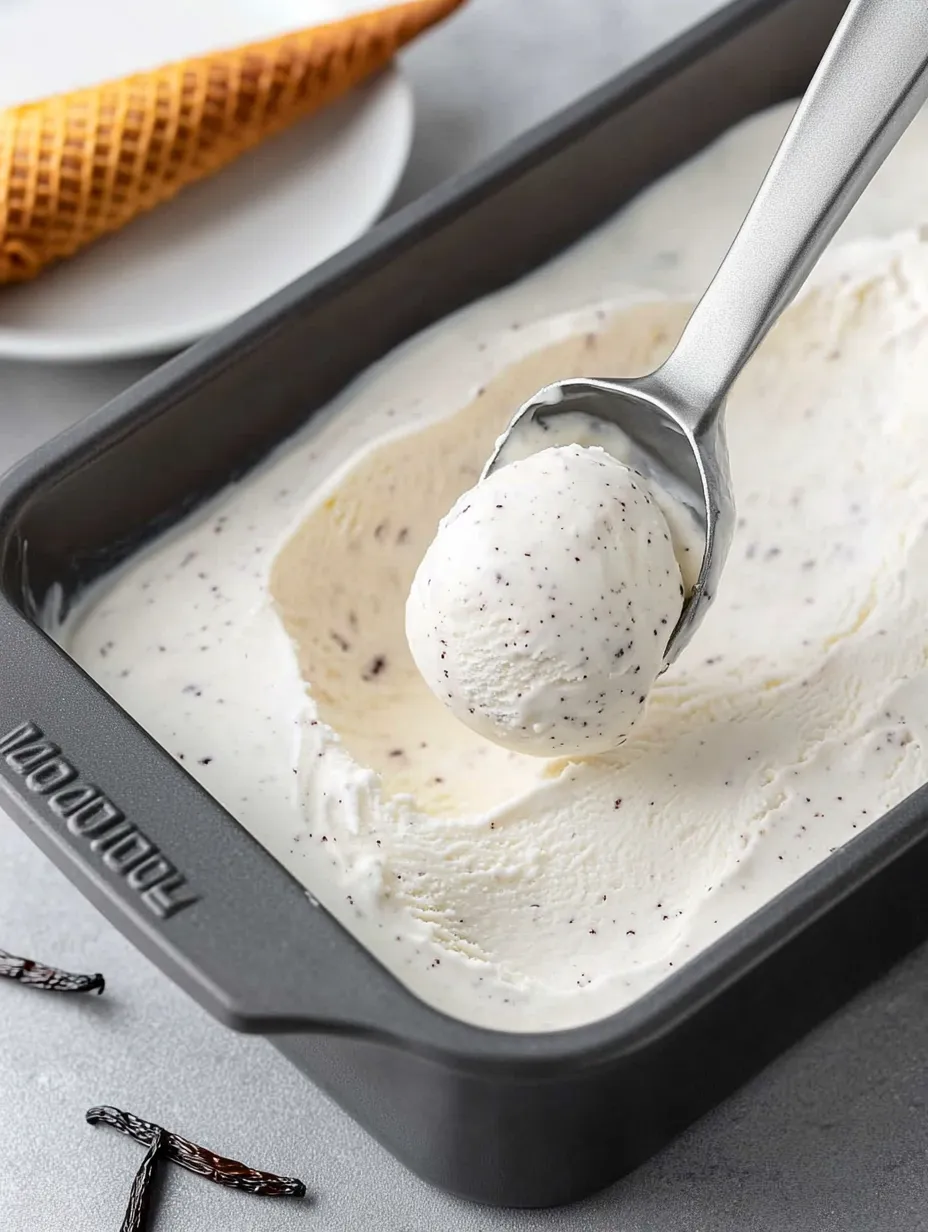
- Proper Container Preparation:
- Select a metal loaf pan for optimal freezing properties. The narrow, deep shape allows proper setting while the metal conducts cold efficiently. Pour the completed mixture into the container, using your spatula to create a smooth, even surface. Cover completely with plastic wrap pressed directly onto the surface to prevent ice crystals from forming.
- Freezing Technique:
- Place the covered pan on a level surface in the coldest part of your freezer. Allow a full six hours minimum freezing time, though overnight setting yields optimal texture development. The gradual freezing process allows proper crystal formation for smooth, creamy results.
Several years ago, I served this ice cream at my daughter's engagement dinner. Her future mother-in-law skeptically questioned "homemade ice cream without a machine" but requested the recipe before dessert was finished. Now we make double batches together during family gatherings, experimenting with seasonal flavor variations while always keeping classic vanilla in the rotation.
The heavy cream's fat content directly impacts texture quality. Scientific analysis shows that higher fat percentages create smaller ice crystals during freezing, resulting in that professional silky mouthfeel. My friend who studied culinary arts explained that commercial stabilizers mimic what happens naturally when using premium ingredients properly.
Elegant Serving Ideas
Transform simple vanilla ice cream into impressive dessert presentations with thoughtful serving methods. Create elegant ice cream sandwiches using homemade thin chocolate cookies or delicate butter cookies for sophisticated contrast. Develop sundae flights with small portions in shot glasses topped with different premium sauces for tasting experiences. Consider affogato presentations by pouring hot espresso over small scoops for dramatic temperature contrast. Serve between cake layers as impromptu ice cream cake for celebrations. For dinner parties, scoop into pre-chilled martini glasses and garnish with chocolate curls and fresh berries just before serving.
Flavor Enhancement Options
- Cookies and Cream: Fold crushed chocolate sandwich cookies into partially frozen mixture.
- Coffee-Infused: Add one tablespoon espresso powder to condensed milk mixture.
- Chocolate Decadence: Incorporate three tablespoons cocoa powder and one-half cup melted chocolate chips.
- Fruit Variations: Add two tablespoons fruit preserves swirled gently into finished mixture.
- Sophisticated Profiles: Experiment with flavors like lavender honey by steeping two teaspoons culinary lavender in cream before chilling and straining.

Preservation Guidelines
- Storage Container: Keep ice cream in metal container with tight-fitting lid or transfer to shallow container with minimal headspace.
- Surface Protection: Place parchment paper directly on ice cream surface before covering to prevent frost formation.
- Freezer Placement: Store toward back of freezer where temperature remains most consistent rather than in door.
- Serving Tips: Allow two minutes standing time at room temperature before serving for ideal scooping consistency. Use wooden or bamboo ice cream scoop for cleaner release and prettier presentation.
- Consumption Timeline: Consume within two weeks for best flavor though properly stored ice cream remains safe much longer.
My earliest ice cream memories involve my grandmother's hand-cranked machine requiring ice and rock salt. When I discovered this no-churn method, I was initially suspicious about texture quality. After perfecting this technique over dozens of batches, I've found the density and creaminess surpasses many commercial premium brands. The real revelation came when sharing with professional chef friends who couldn't believe it wasn't professionally churned. Now it's my signature contribution to summer gatherings, always disappearing faster than elaborate baked desserts that take triple the preparation time.
Frequently Asked Questions
- → Can I use vanilla extract instead of a vanilla bean?
- Absolutely! Substitute the vanilla bean with 2 teaspoons of pure vanilla extract. Add it to the condensed milk mixture for the same great flavor.
- → How long does this ice cream last in the freezer?
- When stored properly in an airtight container, this homemade ice cream stays good for up to 2 weeks. The texture is best within the first week.
- → Why is my ice cream too hard when frozen?
- Homemade ice cream naturally freezes harder than store-bought varieties. Let it sit at room temperature for 5-10 minutes before scooping for the perfect consistency.
- → Can I add mix-ins to this base recipe?
- Definitely! Fold in your favorite mix-ins like chocolate chips, crushed cookies, fruit, or nuts after combining the whipped cream and condensed milk mixture.
- → Why does this recipe work without an ice cream maker?
- The whipped cream adds air to the mixture while the condensed milk provides sweetness and prevents ice crystals, creating a smooth, creamy texture without churning.
- → Can I make this recipe lower in fat?
- While you can try using light cream instead of heavy cream, the full-fat version gives the best texture. The fat in heavy cream helps create that smooth, creamy consistency.