
 Pin it
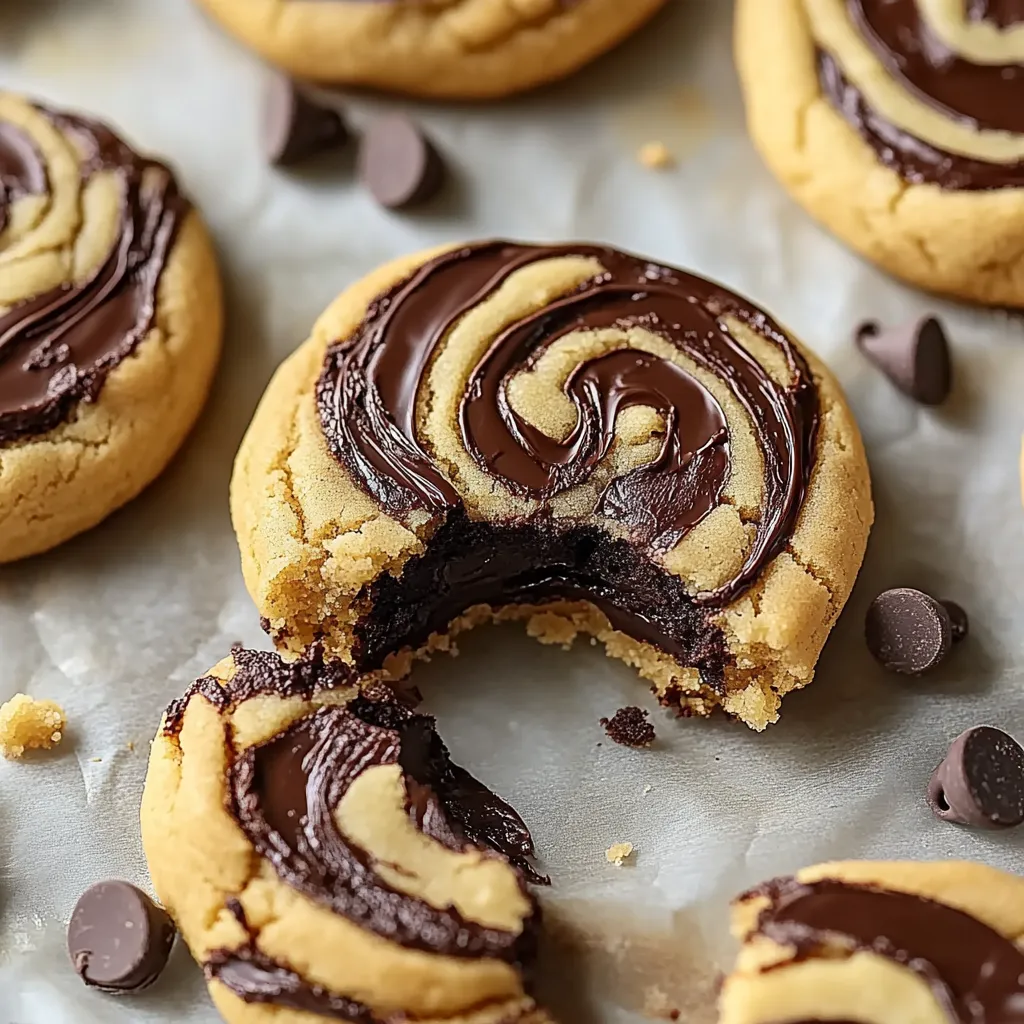
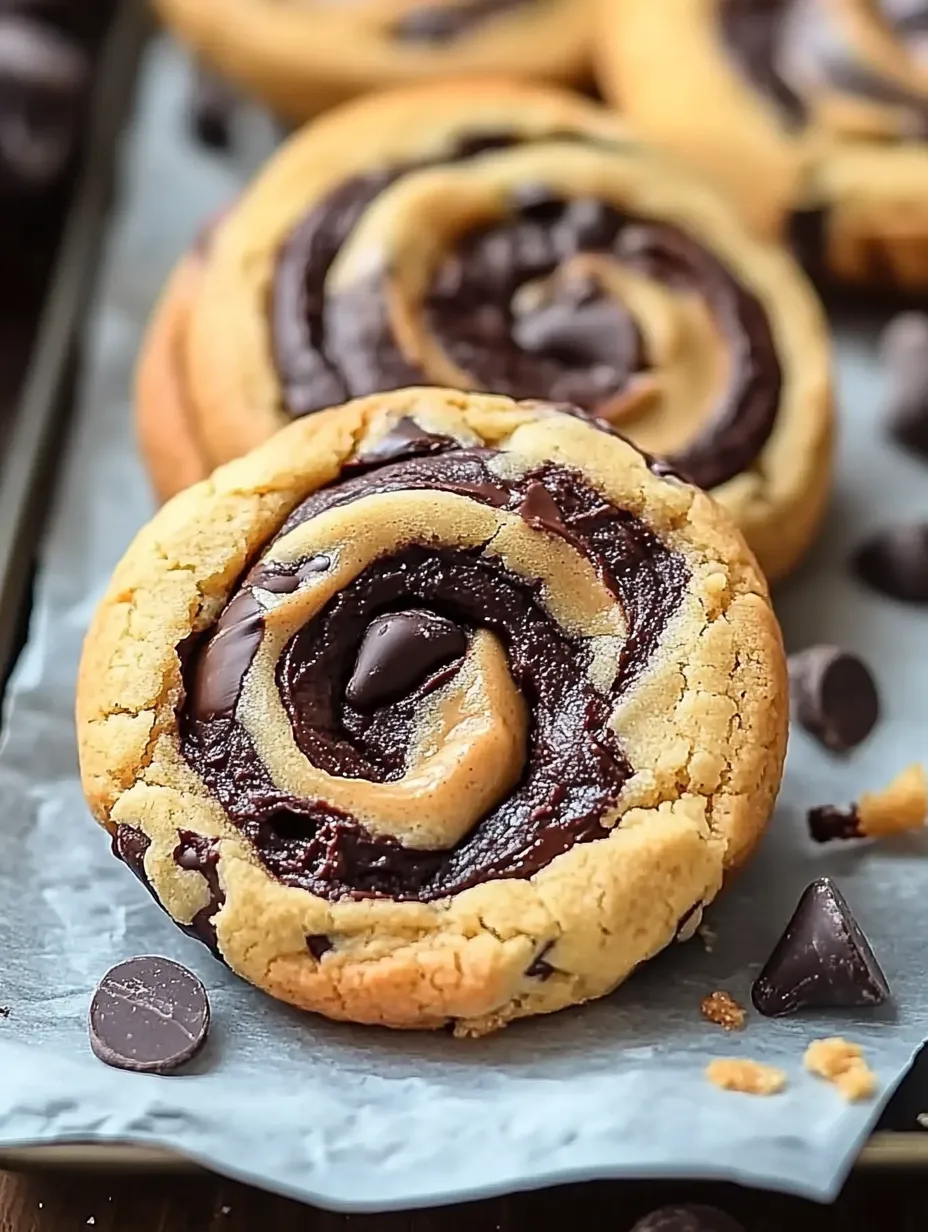
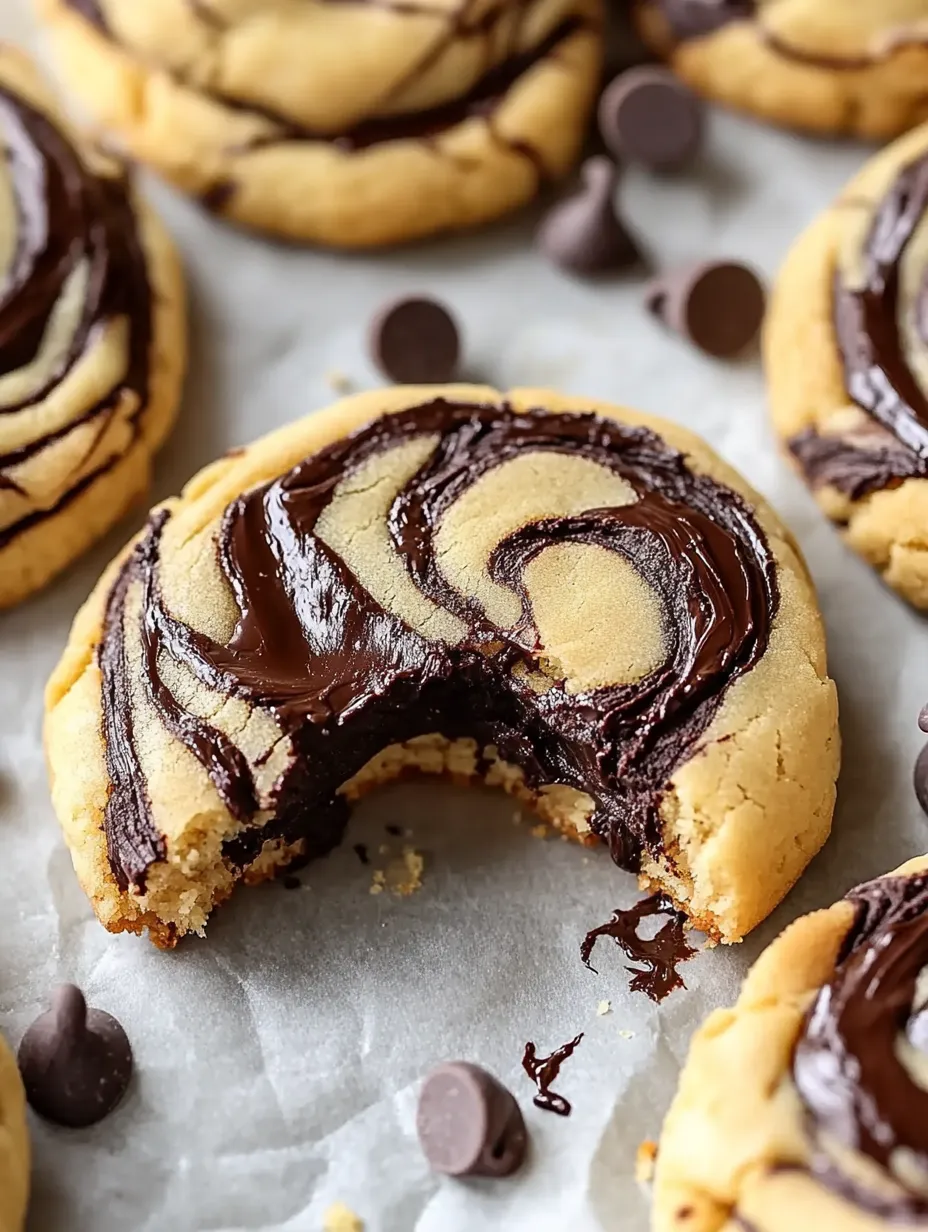
Indulgent swirls of fudgy brownie dough blend with rich peanut butter cookie batter to create an irresistible treat that delivers two beloved flavors in every bite. These striking cookies feature beautiful marbled patterns that make them as visually impressive as they are delicious. The contrast between dark chocolate and golden peanut butter creates a cookie that satisfies intense dessert cravings while looking spectacular on any cookie platter or dessert table.
I created these cookies for a neighborhood bake sale after my son couldn't decide between brownies and peanut butter cookies. Rather than making both, I wondered if combining them might create something special. The first batch disappeared within minutes, with several neighbors requesting the recipe before they even left the table. Now these cookies make regular appearances at school functions, holiday cookie exchanges, and whenever I need a guaranteed crowd pleaser that stands out from ordinary chocolate chip cookies.
Cookie Magic Ingredients
- Creamy Peanut Butter: Creates the distinctive nutty base in half the cookie dough. Commercial varieties like Jif or Skippy work better than natural options for consistent texture.
- Butter: Provides essential richness and proper structure in both doughs. Using unsalted allows precise control of the final saltiness level.
- Brown Sugar: Adds moisture and subtle caramel notes to the peanut butter portion. The molasses content creates chewier texture than white sugar alone.
- White Sugar: Creates the proper crisp exterior in the brownie dough. Its neutral sweetness allows the chocolate flavor to shine through clearly.
- Cocoa Powder: Delivers intense chocolate flavor without adding additional moisture. Dutch processed provides deeper color, while natural cocoa offers more acidic chocolate notes.
- Eggs: Provide structure and binding in both doughs. Room temperature eggs incorporate more efficiently for better texture.
- Vanilla Extract: Enhances both chocolate and peanut butter flavors. Pure extract rather than imitation offers significantly better flavor.
- All Purpose Flour: Creates the proper structure without toughness. Measuring precisely ensures the perfect texture in the finished cookies.
- Baking Soda: Provides the proper rise in the peanut butter dough through reaction with acidic ingredients. Its alkaline nature produces better spread and texture.
- Baking Powder: Creates the perfect lift in the brownie dough. The double acting property ensures consistent rise during baking.
- Salt: Enhances both chocolate and peanut butter flavors significantly. Even a small amount makes all other flavors more pronounced.
- Chocolate Chips: Add pockets of melted chocolate throughout the brownie portions. Semisweet offers the best balance against the sweet doughs.
Cookie Creation Method
- Create Peanut Butter Base:
- Beat peanut butter with softened butter and brown sugar until light and fluffy, incorporating air that creates the perfect texture.
- Add Moisture Elements:
- Incorporate egg and vanilla extract into peanut butter mixture, beating just until combined to maintain proper density.
- Finish PB Dough:
- Add flour, baking soda, and salt to peanut butter mixture, mixing gently just until combined to avoid developing gluten that would toughen cookies.
- Begin Brownie Dough:
- Whisk melted butter with granulated sugar until completely incorporated, creating the foundation for intensely chocolatey flavor.
- Develop Chocolate Flavor:
- Beat cocoa powder into butter mixture until smooth and glossy, ensuring no dry pockets remain that would create bitter bites.
- Add Structure:
- Incorporate egg and vanilla into brownie mixture, beating just until combined to maintain the dense, fudgy texture characteristic of brownies.
- Complete Brownie Dough:
- Fold flour, baking powder, and salt gently into chocolate mixture just until no dry streaks remain, then stir in chocolate chips.
- Chill For Control:
- Refrigerate both doughs for thirty minutes, allowing them to firm slightly for easier handling while preventing excessive spreading during baking.
- Create Swirl Magic:
- Scoop portions of each dough side by side onto parchment lined baking sheets, then use a toothpick to gently marble them together with just a few strokes.
- Bake With Precision:
- Place in preheated oven and bake just until edges are set while centers remain slightly soft, preserving the perfect chewy texture in the finished cookies.
I discovered the importance of proper swirling technique through several test batches where I initially mixed the doughs too aggressively. The distinct marbled effect disappeared, leaving cookies that tasted good but lacked the striking appearance that makes these special. My daughter, who has a natural artistic touch, demonstrated the perfect swirling motion using just three or four gentle passes with a toothpick, creating beautiful patterns that made each cookie unique while maintaining clear separation between the flavors.
Perfect Marbling Technique
Creating the distinctive swirled pattern requires specific technique for best visual impact. After placing both doughs side by side on the baking sheet, insert a toothpick or thin skewer vertically into both portions. Pull the toothpick through the doughs in an "S" or figure eight pattern, making no more than three to four passes. This creates beautiful marbling while maintaining distinct chocolate and peanut butter sections. Overworking the doughs results in muddy coloring rather than the striking contrast that makes these cookies visually spectacular. Each cookie becomes a unique creation with its own artistic pattern, adding to their special appeal.
Texture Control Secrets
Achieving the perfect texture balance in these dual dough cookies requires attention to specific details. The peanut butter dough should be slightly firmer than the brownie dough before swirling, as this creates the best marbled effect when baked. If your peanut butter dough seems too soft, add an additional tablespoon of flour. Conversely, if the brownie dough appears too stiff, add a teaspoon of milk to achieve the proper consistency. The finished cookies should have slightly crisp edges with soft, chewy centers, mimicking the texture contrast found in perfect brownies. Baking time significantly impacts final texture, with even one minute making the difference between perfectly chewy and overly crisp cookies.
Temperature Considerations
Room temperature ingredients create superior cookies through better incorporation and proper chemical reactions during mixing and baking. Allow butter to soften naturally rather than microwaving, which can create hot spots that affect dough consistency. Remove eggs from refrigeration at least thirty minutes before beginning. Conversely, properly chilled dough creates better defined swirls and prevents excessive spreading during baking. The contrast between room temperature ingredients for proper mixing and chilled dough for optimal baking creates cookies with perfect texture and appearance. After baking, allowing cookies to cool directly on the baking sheet for several minutes permits carryover cooking that sets the centers properly.
Creative Flavor Variations
While the classic chocolate peanut butter combination delivers perfect results, several variations create exciting alternatives. For a holiday twist, add a quarter teaspoon of peppermint extract to the brownie dough and substitute white chocolate chips for semisweet. Create a mocha version by adding a tablespoon of instant espresso powder to the brownie portion. For peanut butter cup inspired cookies, press a miniature peanut butter cup into the center of each cookie immediately after baking. Introduce texture contrast by adding chopped peanuts to the peanut butter dough or substitute crunchy peanut butter for the creamy version.
Serving Strategy Suggestions
Transform these cookies from casual treats to impressive desserts through thoughtful presentation. For cookie exchanges, place in paper baking cups inside a decorative tin for elegant gifting. Create an impressive dessert by sandwiching vanilla ice cream between two cookies for spectacular ice cream sandwiches. For afternoon tea or coffee gatherings, arrange cookies in a spiral pattern on a cake stand, creating visual impact through the marbled patterns. Package individually in clear cellophane bags tied with ribbon for beautiful homemade gifts during holiday seasons or as party favors for special celebrations.
Storage Success Techniques
Maintain optimal freshness by storing completely cooled cookies in an airtight container at room temperature with parchment paper between layers to prevent sticking. Add a slice of bread to the container to keep cookies soft for up to five days by providing ambient moisture. For longer storage, freeze baked cookies individually on a baking sheet until solid, then transfer to freezer bags with air removed, where they remain fresh for up to three months. Thaw frozen cookies at room temperature for one hour before serving, or microwave individual cookies for 10 seconds for the just baked experience.
These marbled cookies represent everything I love about creative baking, transforming classic flavor combinations in unexpected ways that delight both the eye and the palate. The dramatic swirled appearance makes them conversation starters at gatherings, while the beloved combination of chocolate and peanut butter ensures empty cookie plates. What continues to make me smile about this recipe is watching people's expressions when they first see these cookies, followed by their looks of pure enjoyment after the first bite. The way these treats combine visual drama with familiar, comforting flavors makes them special enough for celebrations while remaining accessible enough for everyday baking whenever a chocolate peanut butter craving strikes.
Frequently Asked Questions
- → Can I make the dough ahead of time?
- Yes! Both doughs can be made up to 2 days ahead and stored in the refrigerator. Let them sit at room temperature for about 15 minutes before scooping to make them easier to work with.
- → Why do I need to chill the dough?
- Chilling helps prevent the cookies from spreading too much during baking and makes the doughs easier to handle when creating the swirl pattern. Don't skip this step for best results.
- → Can I use crunchy peanut butter instead of creamy?
- Yes, you can use crunchy peanut butter if you prefer some texture in your cookies. The dough may be slightly more difficult to swirl, but it will still taste delicious.
- → How do I store these cookies?
- Store in an airtight container at room temperature for up to 5 days. You can also freeze the baked cookies for up to 3 months - just thaw at room temperature when ready to enjoy.
- → Can I make these cookies larger?
- Yes! For larger cookies, use 2-3 tablespoons of each dough and increase the baking time by 2-3 minutes. Keep an eye on them, as you still want the centers to be soft when removed from the oven.
- → How do I know when the cookies are done?
- The cookies are done when the edges are set and the tops have a light crackly appearance. The centers will still look slightly underdone - this is perfect! They'll continue to set as they cool on the baking sheet.