
 Pin it
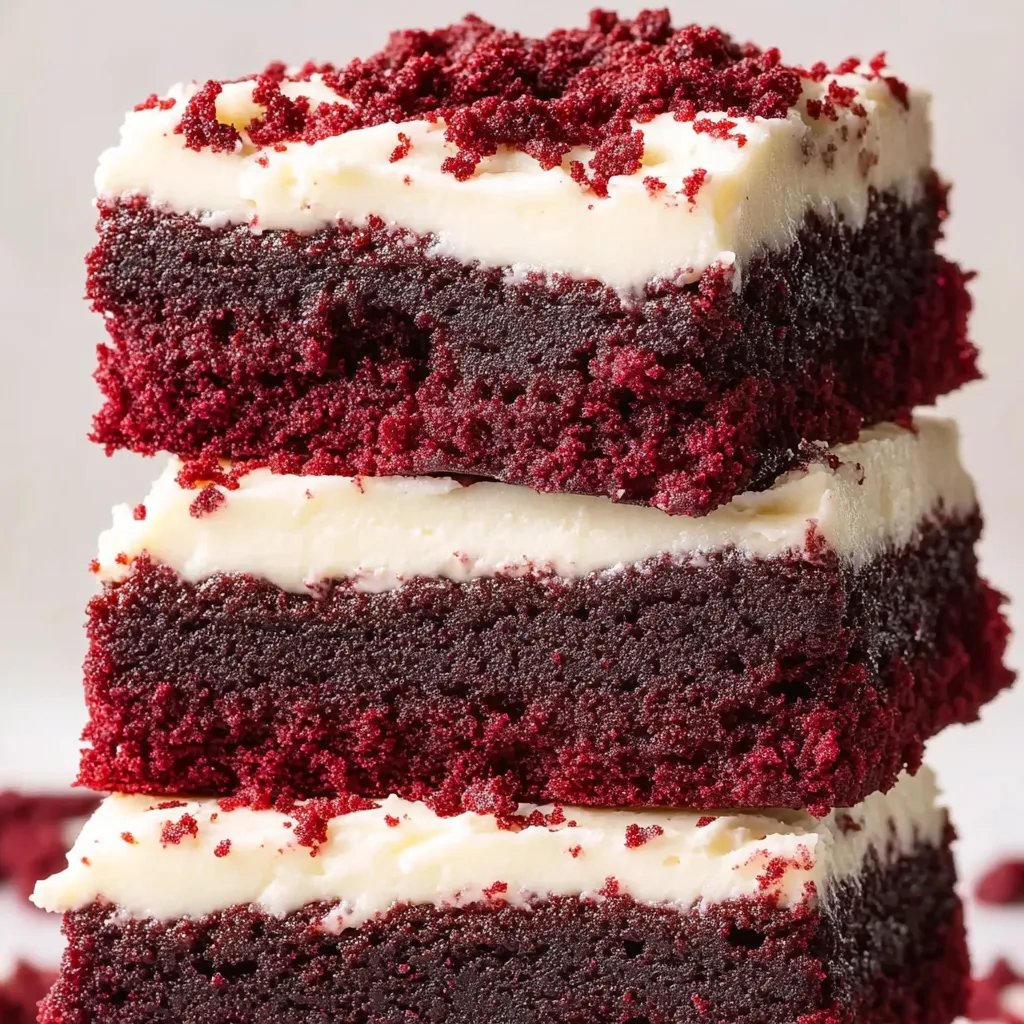
These red velvet brownies are the fudgiest treat to satisfy any sweet tooth and become an instant crowd-pleaser thanks to their signature luscious color and a swirl of tangy cream cheese frosting. The simple recipe comes together quickly for last-minute gatherings or cozy nights in my own tradition is whipping these up for Valentine’s Day and birthdays since their striking hue and rich flavors win over everyone who tries them.
I first made these brownies for a bake sale at my daughter’s school and came home with an empty tray and recipe requests from every parent. Their deep red color always draws people in but it is that fudgy bite that brings them back for seconds.
Ingredients
- Unsalted butter: gives a rich base use fresh high quality for best flavor
- Granulated sugar and light brown sugar: create the classic chewy brownie texture use fine quality sugars
- Eggs and egg yolk: bind everything and keep brownies moist opt for free range if possible
- Vanilla extract: enhances all the flavors always choose pure vanilla not imitation
- Vegetable oil: adds a silky texture and keeps the brownies tender
- Cocoa powder: turns these brownies into chocolate heaven look for Dutch process for a smooth taste
- All-purpose flour: for structure make sure to measure accurately or use a scale
- Vinegar: brings slight tang and deepens the red color distilled white works well
- Cornstarch: helps produce a soft bite and prevents toughness
- Salt: sharpens all the flavors use fine sea salt for even distribution
- Red food coloring: gives the iconic color gel works best for deep color without thinning the batter
- White chocolate chips (optional): for an extra creamy pop of sweetness use high quality chips for best melt
Cream Cheese Frosting
- Cream cheese: use full fat blocks for thick creamy results
- Unsalted butter: for smoothness and a rich backdrop
- Powdered sugar: for classic sweetness always sift to prevent lumps
- Vanilla extract: for a hint of warmth
Step-by-Step Instructions
- Prepare the Pan and Oven:
- Line a nine inch square cake pan with parchment paper. Preheat the oven to three hundred fifty degrees Fahrenheit or one hundred eighty Celsius ensuring the fan setting if you have it is at one hundred sixty degrees Celsius. This step keeps brownies from sticking and promotes even baking.
- Melt the Butter:
- Melt your unsalted butter in the microwave using thirty second bursts stir between each until completely liquid. Do not let the butter bubble or brown as this changes the flavor.
- Combine Sugars and Butter:
- Pour both the granulated and light brown sugar into a large mixing bowl. Add the melted butter and whisk together until the sugar begins to dissolve and the mixture is glossy this is your foundation for fudgy texture.
- Incorporate Eggs and Vanilla:
- Add the eggs the extra yolk and vanilla extract to the bowl. Mix gently just until blended. Avoid whipping air into the mixture as too much air will create a cakey texture instead of that classic dense brownie.
- Add Oil and Cocoa Powder:
- Drizzle in the vegetable oil and sprinkle on the cocoa powder. Gently whisk the batter together just until cocoa is fully mixed in for rich chocolate flavor.
- Make and Add Red Coloring Paste:
- Take two tablespoons of the batter and put it in a small bowl. Add the red food coloring and stir thoroughly until the gel is smooth and fully incorporated then pour this back into the main batter. Mixing the color separately ensures the shade is even without streaks.
- Fold in Dry Ingredients:
- Switch to a rubber spatula or wooden spoon and gently fold in the flour cornstarch and salt until no visible flour remains. Do not overwork the batter or gluten will develop and your brownies could turn tough.
- Stir in Vinegar:
- Add the vinegar and fold it in evenly. This is the secret to the classic red velvet flavor and to enhancing the color.
- Optional Add White Chocolate Chips:
- If using sprinkle in white chocolate chips now and gently fold just until distributed. These add creamy pops in every bite.
- Bake:
- Pour the batter into your prepared pan and spread it evenly to the corners. Bake in the center of your oven for twenty to twenty five minutes or until a skewer inserted comes out with a few moist crumbs. Start checking at the twenty minute mark brownies should not be overbaked.
- Cool Completely:
- Remove the pan from the oven and cool brownies completely in the pan. Frosting while warm will melt the icing and create a mess.
- Cream Cheese Frosting – Beat Butter and Cream Cheese:
- In a bowl beat together the softened butter and cream cheese until very smooth and creamy with no lumps. Starting with room temperature ingredients helps greatly.
- Add Powdered Sugar:
- Gradually add sifted powdered sugar beating slowly at first to avoid a sugar cloud then increase to high speed until the mixture is fluffy this will take a few minutes.
- Stir in Vanilla:
- Mix in vanilla for a heavenly fragrance and finish blending until incorporated.
- Frost and Slice:
- Spread the frosting generously over cooled brownies using an offset spatula for smooth coverage. Slice into squares and serve.
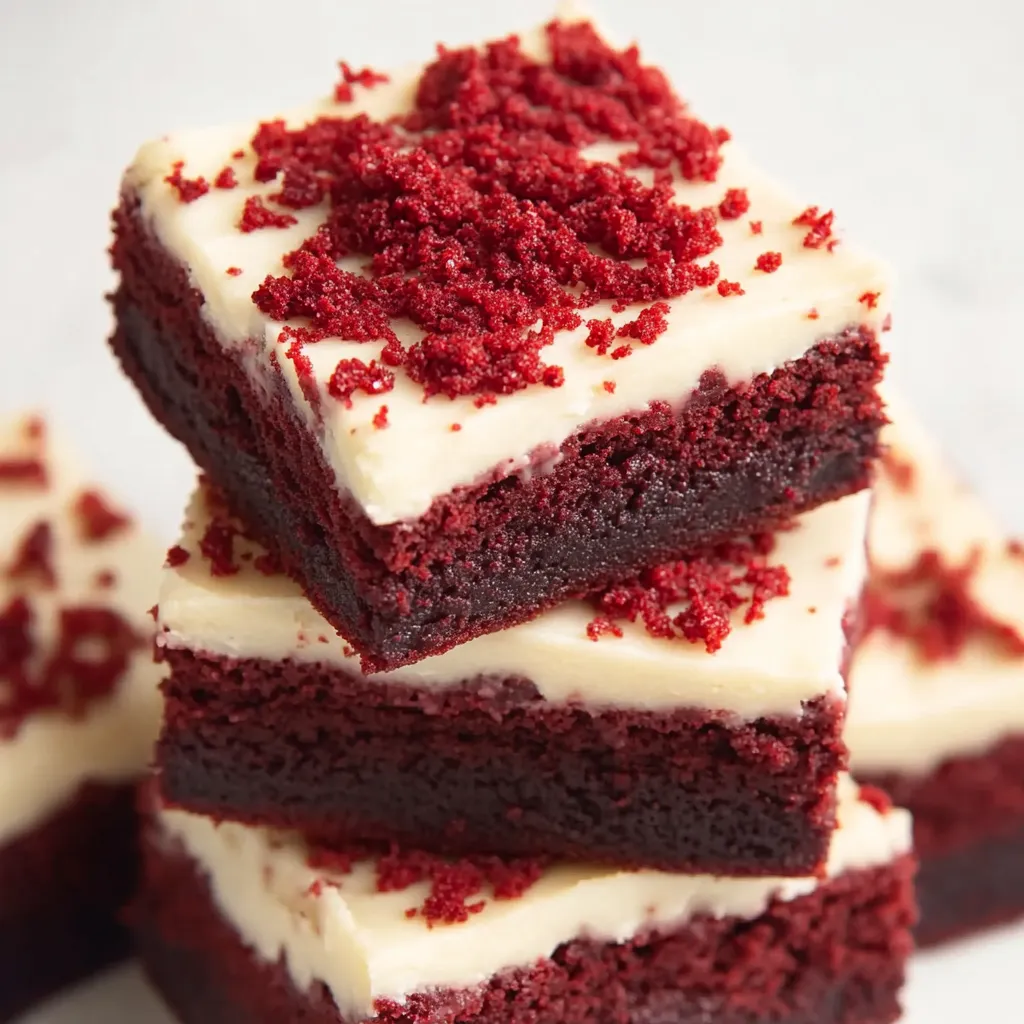
The cocoa powder is my secret weapon here as it makes the brownies deeply chocolaty without overpowering the subtle tang of the cream cheese frosting. One of my favorite memories is letting my niece swirl on the frosting herself for the first time and watching her beam as she brought the finished tray to our family table.
Storage Tips
Store leftover brownies in an airtight container in the fridge for up to five days. Let them come to room temperature before serving so the frosting and brownie reach their best texture. For longer storage freeze unfrosted brownies well wrapped for up to three months and thaw before frosting.
Ingredient Substitutions
You can swap melted coconut oil or canola oil for vegetable oil if you like. If you want a gluten free version use a trusted one to one all purpose gluten free baking flour. If you are out of cream cheese for the frosting try whipped mascarpone for an equally smooth result but with a milder tang.
Serving Suggestions
Serve these brownies chilled straight from the fridge for a dense chewy bite or let them come to room temperature for maximum fudginess. I love a square alongside strong coffee or a scoop of vanilla ice cream for ultimate dessert decadence. For holidays sprinkle with heart shaped sprinkles or crushed freeze dried berries on top.
The Story Behind Red Velvet
Red velvet has roots in early twentieth century American baking where cocoa and acidic ingredients like vinegar produced a natural reddish hue before modern food coloring. Bakeries in the south made it famous for its dramatic contrast between tender cake and tangy, creamy icing and today the flavor is cherished everywhere from birthdays to weddings.
Frequently Asked Questions
- → How do I achieve a chewy brownie texture?
Accurate measurement of flour and gentle mixing prevent cakiness and ensure chewy, fudgy brownies.
- → Is food coloring required for this dessert?
While not strictly necessary for flavor, red food coloring creates the signature hue of red velvet.
- → Can I skip the cream cheese frosting?
Yes, but the tangy cream cheese topping adds balance and pairs wonderfully with the cocoa-rich base.
- → Should I use white chocolate chips in the batter?
White chocolate chips are optional. If you prefer extra sweetness and texture, fold them in before baking.
- → Why is vinegar used in the mixture?
Vinegar maintains moisture and enhances the classic red velvet flavor, reacting with cocoa powder for depth.