
 Pin it
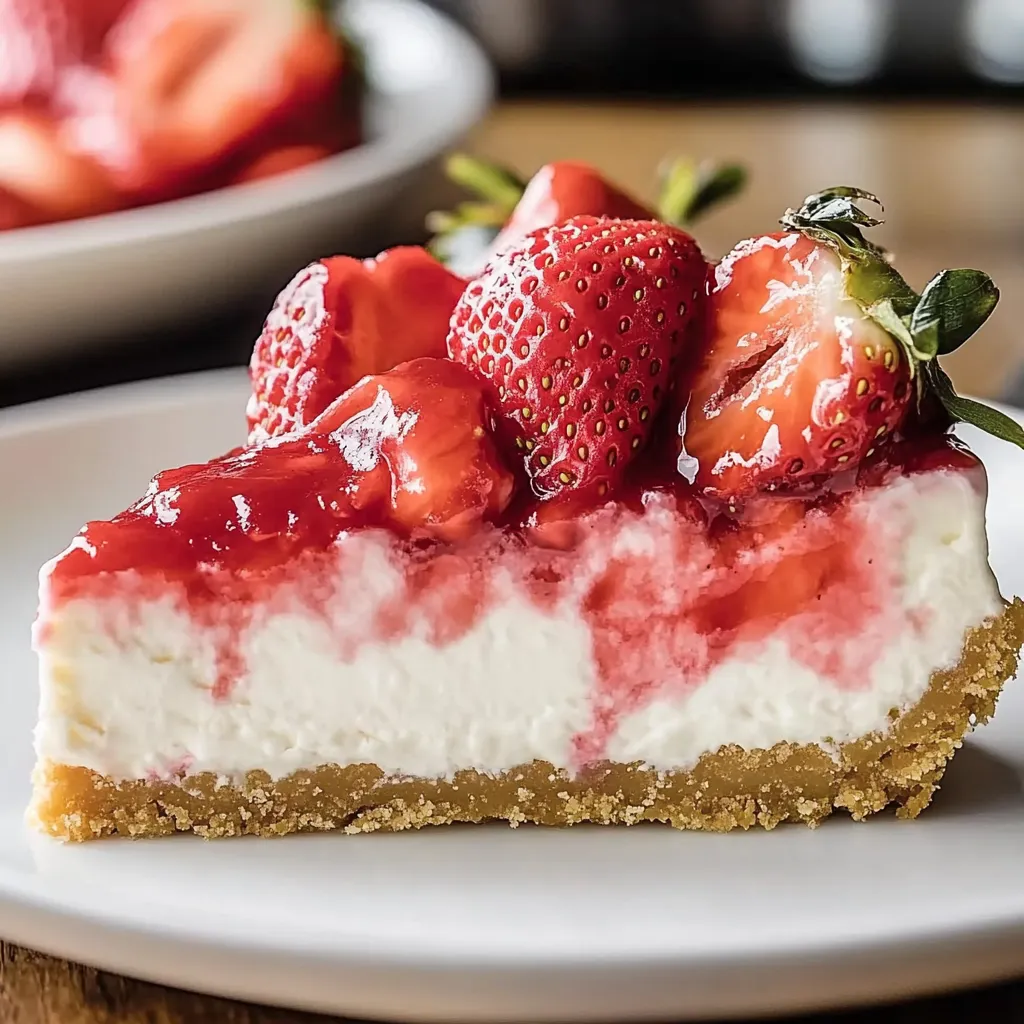
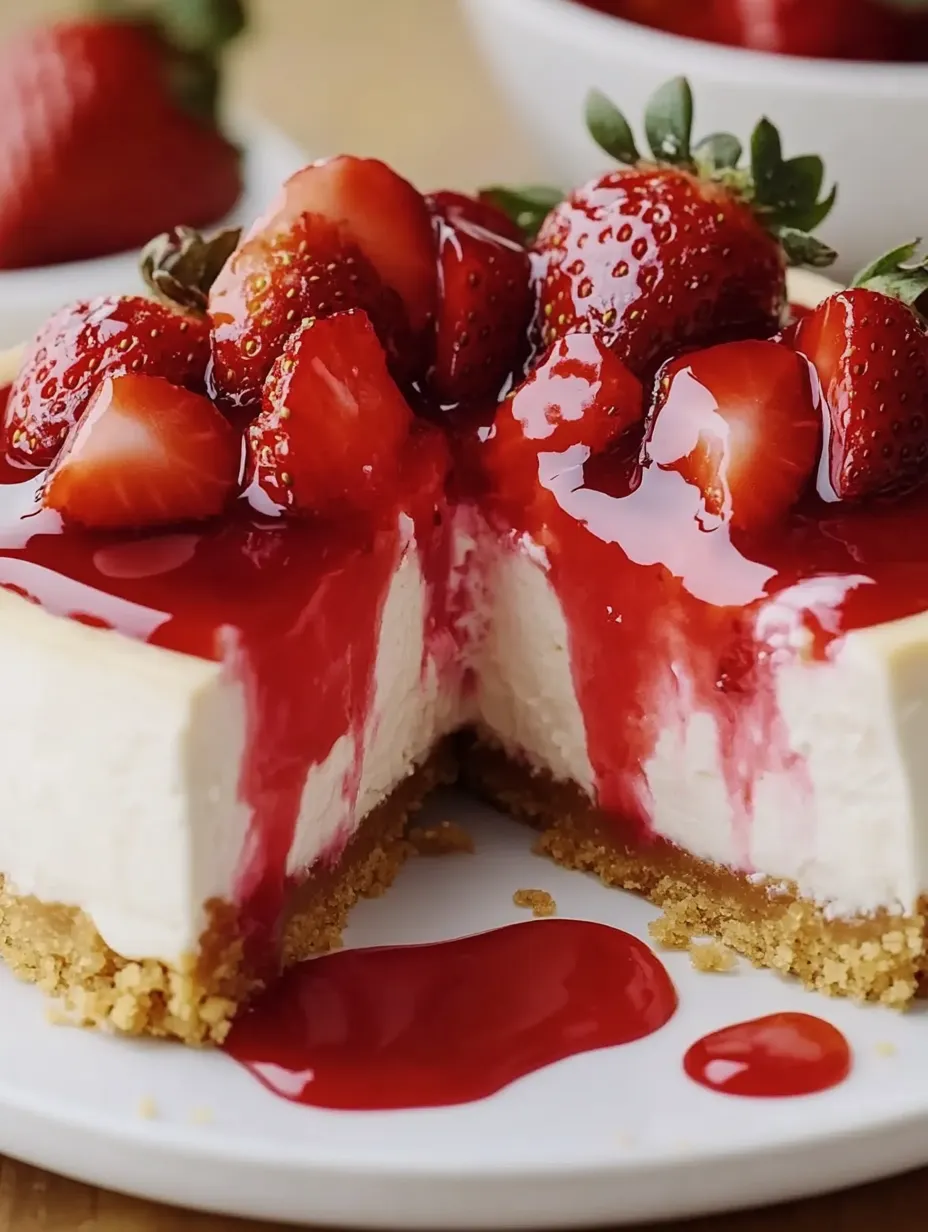
This classic strawberry cheesecake offers the perfect balance of creamy richness and sweet-tart berry topping. With its buttery graham cracker crust and velvety smooth filling, it's a showstopper dessert that never fails to impress guests or satisfy your sweet tooth cravings.
I first made this cheesecake for my sister's birthday gathering, and the complete silence that fell over the table as everyone took their first bite told me everything I needed to know. Now it's become my signature dessert that friends specifically request when they visit.
Ingredients
For the Crust
- Graham cracker crumbs: Add that classic honeyed flavor and perfect texture foundation for any cheesecake
- Granulated sugar: Enhances the sweetness and helps bind the crust
- Unsalted butter: Provides richness and holds everything together look for European style butter for extra richness
For the Filling
- Cream cheese: Creates that signature tangy flavor and creamy texture always use full fat for best results
- Granulated sugar: Sweetens the filling without adding moisture
- Cornstarch: Stabilizes the cheesecake and prevents cracking
- Eggs: Provide structure and richness to the filling always use room temperature eggs
- Sour cream: Adds moisture and a subtle tang that balances the sweetness
- Heavy cream: Creates an ultra silky texture
- Vanilla extract: Enhances all the flavors choose pure vanilla not imitation
For the Strawberry Topping
- Fresh strawberries: Give bright flavor and beautiful color choose ripe berries with deep red color
- Granulated sugar: Balances the natural tartness of the berries
- Cornstarch: Thickens the topping to perfect consistency
- Lemon juice: Brightens and enhances the natural strawberry flavor
Step-by-Step Instructions
Prepare the Pan
Create a waterproof seal by wrapping the springform pan in multiple layers of foil. This critical step prevents water from seeping into your crust during baking. Make sure the foil extends at least halfway up the sides of the pan without covering the top edge.
Create the Crust
Mix graham cracker crumbs thoroughly with sugar and melted butter until every crumb is moistened. The texture should resemble wet sand that holds together when pressed. Using a measuring cup to firmly pack the mixture creates an even thickness throughout the bottom and sides.
Prebake the Crust
Baking the crust before adding the filling ensures it stays crisp rather than soggy. The golden color develops a toasty flavor that complements the tangy filling. Watch carefully as it can go from perfect to burnt quickly.
Prepare the Filling
Beat the cream cheese until absolutely smooth before adding any other ingredients. This prevents lumps that are impossible to remove later. Scraping down the sides and bottom of the bowl between additions ensures everything incorporates evenly.
Create the Water Bath
The water bath is the secret to perfect texture. It regulates temperature around the cheesecake creating a humid environment that prevents cracking and ensures gentle even cooking. Make sure the water is hot when you add it to create immediate steam.
Master the Baking Technique
The initial high heat helps set the top of the cheesecake quickly then the lower temperature gently cooks the interior without overcooking the edges. The gradual cooling prevents the dramatic temperature change that causes cracks.
Make the Strawberry Topping
Cook only half the berries initially to create a glossy sauce while preserving the fresh texture of the remaining berries. Stirring constantly prevents scorching and ensures smooth thickening. Adding the remaining fresh berries gives wonderful texture contrast.
The water bath technique transformed my cheesecake game completely. I used to struggle with cracked tops and overcooked edges until I learned this restaurant method. Now I actually find making cheesecake therapeutic the methodical process creates such spectacular results.
Perfecting Your Technique
The cream cheese temperature matters tremendously. For truly lump free filling ensure your cream cheese sits at room temperature for at least two hours before beginning. Cold cream cheese will never fully incorporate no matter how long you beat it resulting in a lumpy filling.
Seasonal Variations
While fresh strawberries create the most vibrant topping you can adapt this recipe year round. During summer use fresh berries from the farmers market at their peak sweetness. In winter frozen strawberries work beautifully just thaw completely and drain excess liquid before using. You can also substitute other berries like raspberries blueberries or blackberries for delicious variations.
Make Ahead Tips
This cheesecake actually improves with time. The flavors develop and the texture becomes even more velvety after 24 hours in the refrigerator making it perfect for advance preparation. Store covered in the refrigerator up to 5 days though it rarely lasts that long! Add the strawberry topping just before serving for the freshest presentation.
Storage Solutions
For longer storage slice the cooled cheesecake into individual portions and freeze separately. Wrap each slice in plastic wrap then aluminum foil to prevent freezer burn. Thaw overnight in the refrigerator when ready to enjoy. The topping can be stored separately in an airtight container for up to 3 days.
Frequently Asked Questions
- → How do I prevent cracks in the cheesecake?
Use a water bath to regulate temperature and avoid overmixing the batter. Also, allow slow cooling in the oven.
- → Can I use frozen strawberries for the topping?
Yes, frozen strawberries can be used. Thaw them beforehand and adjust the cooking time to reduce extra moisture.
- → What is the purpose of the water bath?
The water bath ensures even baking and prevents cracking by maintaining a consistent temperature around the cheesecake.
- → Can I make this cheesecake ahead of time?
Yes, the cheesecake can be made a day ahead. Ensure it chills in the fridge overnight for the best texture and flavor.
- → How do I store leftover cheesecake?
Store leftover cheesecake in an airtight container in the fridge for up to 5 days. You can also freeze it for up to 2 months.