
 Pin it
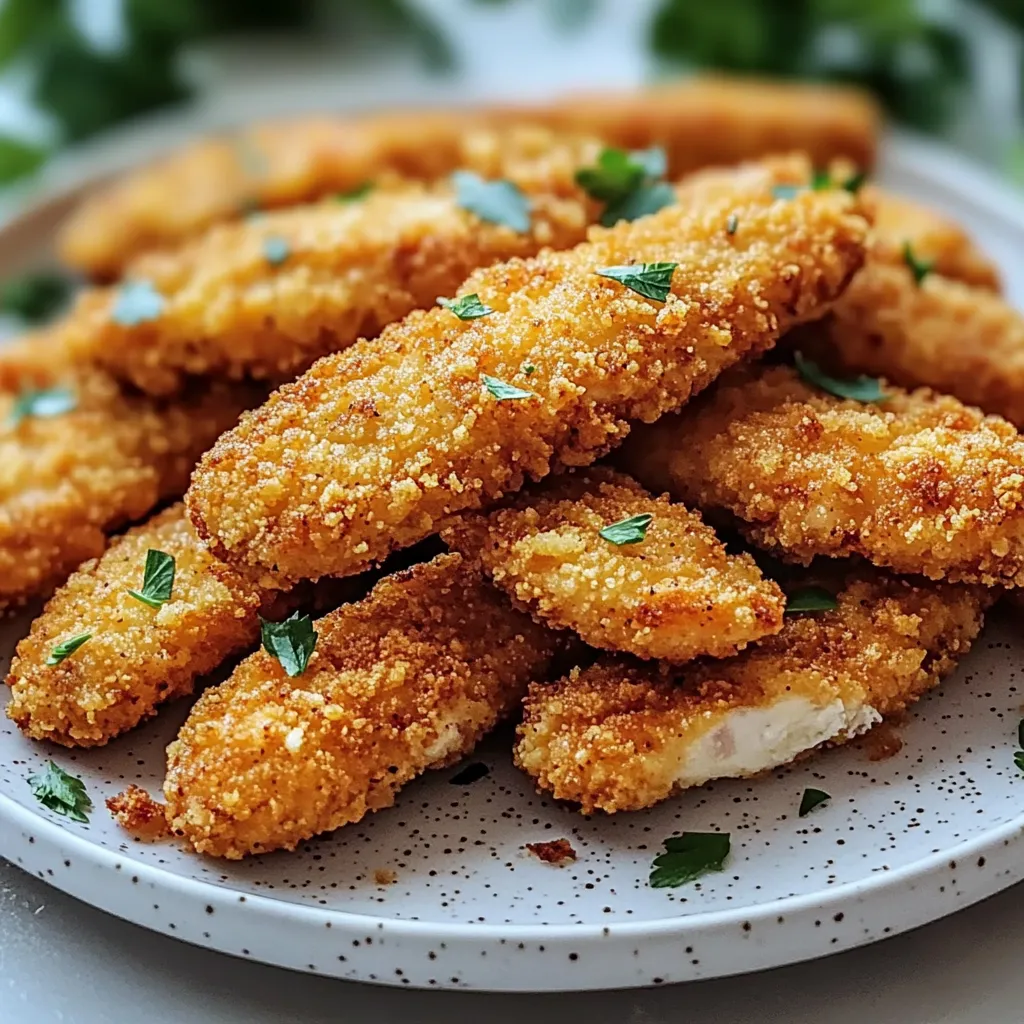
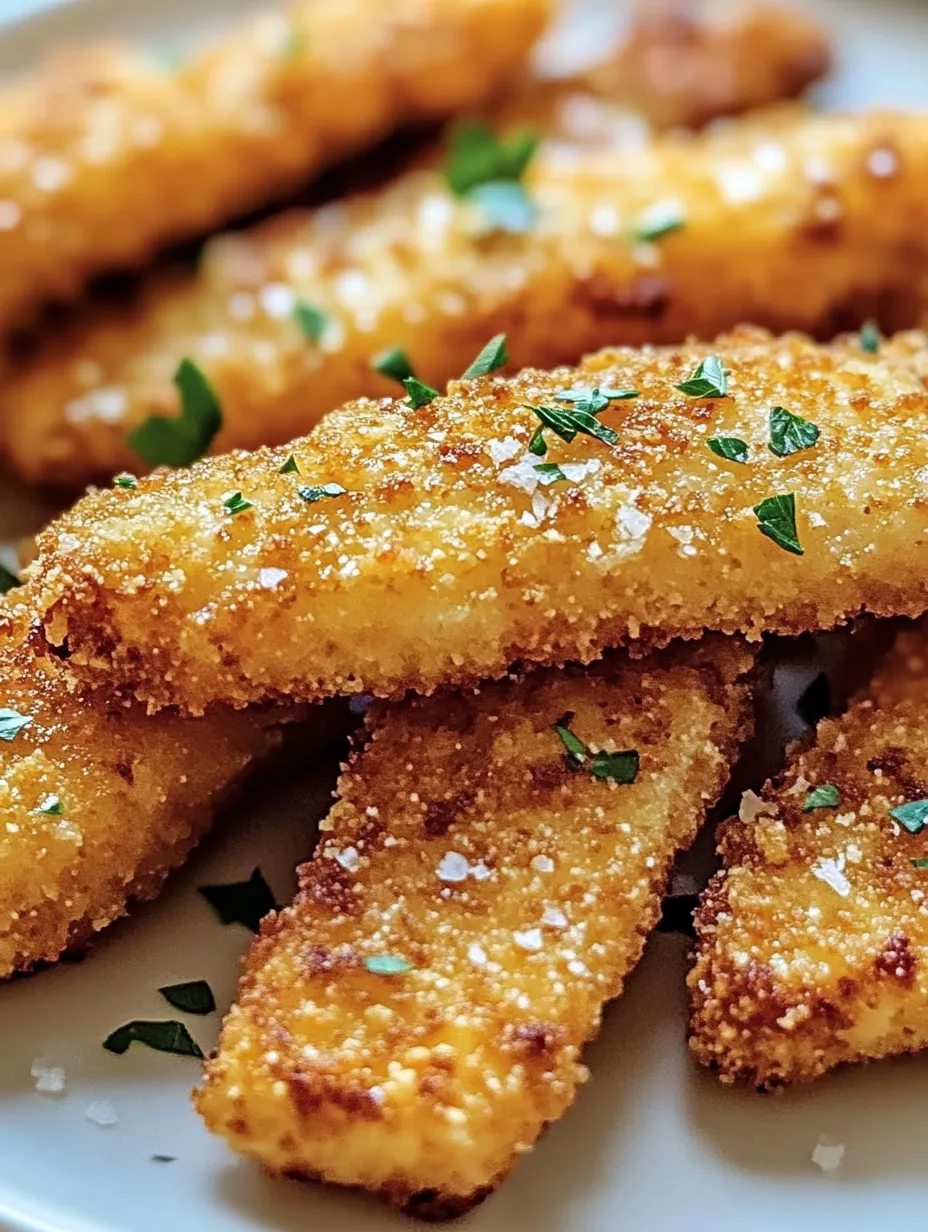
This crispy baked chicken tender recipe transforms ordinary chicken into deliciously golden, crunchy strips without the deep fryer. I've perfected this healthier version after years of testing, and it's now my go-to for satisfying that fried chicken craving without the guilt.
I first created these tenders when trying to recreate my children's favorite restaurant meal at home. After several attempts tweaking the seasonings and baking method, they now request these over the drive-thru version every time.
Ingredients
- Chicken breasts or tenders: Fresh, boneless chicken provides the perfect canvas. Look for organic if possible for best flavor
- Eggs: Create the essential "glue" that helps breadcrumbs adhere perfectly to the chicken
- Panko breadcrumbs: The secret to exceptional crispiness. Japanese-style panko creates a lighter, airier coating than regular breadcrumbs
- Parmesan cheese: Adds a savory depth and helps create golden browning. Use freshly grated for best results
- Garlic powder: Provides aromatic flavor without burning like fresh garlic might at high temperatures
- Paprika: Adds color and a subtle smoky sweetness to the coating
- Onion powder: Contributes savory notes without the moisture of fresh onion
- Salt and pepper: Essential seasoning that enhances all other flavors
- Olive oil spray: Helps achieve that golden, crispy exterior without deep frying
Step-by-Step Instructions
- Prep the Chicken:
- Slice chicken breasts into even strips about 1-inch wide. Pat them dry with paper towels to remove excess moisture, which ensures better breading adhesion. If using pre-cut tenders, simply trim any tendon pieces for a neater presentation.
- Prepare the Breading Stations:
- Beat eggs thoroughly in a wide, shallow bowl until completely blended with no streaks remaining. In a separate bowl, whisk together your dry ingredients thoroughly to ensure even distribution of seasonings throughout the breadcrumbs and Parmesan cheese.
- Season the Chicken:
- Sprinkle raw chicken strips lightly with salt and pepper before the breading process. This seasons the meat itself, not just the coating, creating layers of flavor throughout the tender.
- Bread the Chicken:
- Use one hand for wet ingredients and one for dry to prevent creating a paste on your fingers. Dredge each chicken piece through egg mixture, allowing excess to drip off for 5 seconds. Then place in breadcrumb mixture and press coating firmly onto all sides of the chicken. For extra crunch, let breaded tenders rest 5 minutes before baking.
- Prepare the Baking Sheet:
- Line your baking sheet with parchment for easy cleanup. If using a wire rack, lightly spray it with oil to prevent sticking. The elevated position allows hot air to circulate completely around the tenders, creating maximum crispiness on all sides.
- Arrange the Chicken:
- Place breaded tenders with at least 1-inch spacing between pieces. Overcrowding the pan creates steam that defeats your crispy coating goals. Work in batches if needed rather than crowding the pan.
- Bake the Chicken Tenders:
- Preheat your oven completely before baking. Spray tenders lightly but thoroughly with olive oil spray for that golden finish. Bake until internal temperature reaches exactly 165°F, checking with a meat thermometer at the thickest part. Flip carefully using tongs rather than a spatula to maintain the coating integrity.
- Serve and Enjoy:
- Let tenders rest briefly after baking. This allows the juices to redistribute through the meat and the coating to set properly. Serve immediately while still hot and crispy for the best experience.
My favorite part of this recipe is the versatile seasoning blend. I discovered the power of adding Parmesan to the breading when trying to recreate my grandmother's famous fried chicken. That simple addition transformed these from good to absolutely craveable, adding a savory note that elevates the entire dish.
Dipping Sauce Ideas
A great chicken tender deserves the perfect sauce companion. Beyond the standard ketchup, try homemade honey mustard by mixing equal parts honey, Dijon mustard, and mayonnaise with a splash of lemon juice. For something unique, mix sriracha with mayo and a touch of lime juice for a spicy kick. My family's favorite is a simple garlic aioli made with mayonnaise, minced garlic, lemon juice, and fresh herbs.
Storage and Reheating
These chicken tenders maintain their quality remarkably well when stored properly. Refrigerate leftovers in an airtight container for up to 3 days. To freeze, arrange freshly cooled tenders on a baking sheet without touching, freeze until solid, then transfer to freezer bags. They keep beautifully for up to 3 months. For reheating, avoid the microwave which creates soggy results. Instead, place cold tenders on a wire rack in a 375°F oven for 10 minutes until heated through and crispy again.
Customization Options
Create endless variations of this recipe by adjusting the seasonings. Try Italian herbs like oregano and basil mixed into the breadcrumbs for a Mediterranean twist. For a Southwestern flavor profile, add cumin, chili powder, and a pinch of cayenne to the coating. Gluten free diners can substitute gluten free panko or crushed rice Chex cereal for the breadcrumbs with excellent results. The basic technique remains the same while allowing for personal preference adaptations.
Kid Friendly Adaptations
Transform this recipe into a fun cooking project for children. Let kids help with the breading process by designating an assembly line. Younger children can help whisk eggs while older ones can handle the dipping and coating. Create dinosaur or other shapes by cutting chicken before breading for extra engagement. Serving these homemade tenders gives you complete control over ingredients while providing a familiar favorite that even picky eaters will approve.
Frequently Asked Questions
- → How do I ensure the tenders are crispy?
Use panko breadcrumbs for a crunchier texture and spray with olive oil before baking. Use a wire rack for air circulation.
- → Can I use chicken breasts instead of tenders?
Yes, just cut chicken breasts into 1-inch-wide strips for similar results to chicken tenders.
- → What dipping sauces pair well with baked chicken tenders?
Popular options include honey mustard, BBQ sauce, ranch, or even a spicy sriracha mayo for added zing.
- → Can I prepare these tenders in advance?
Yes, you can bread the chicken ahead of time and refrigerate. Bake when ready for a quick meal.
- → What can I use instead of panko breadcrumbs?
Regular breadcrumbs work too, but panko provides a lighter and crispier texture for the coating.