
 Pin it
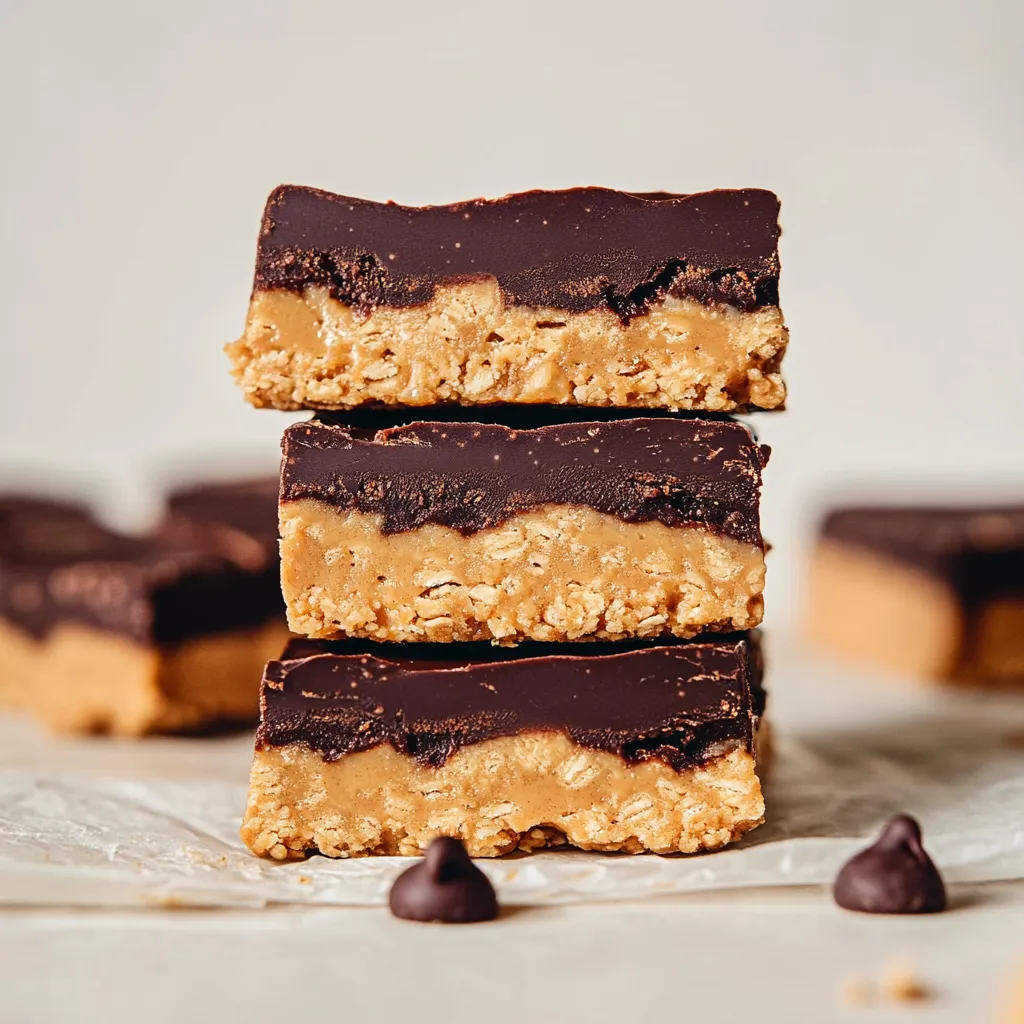
Decadent keto peanut butter chocolate bars satisfy sweet cravings while maintaining your low carb lifestyle with only 8g net carbs per serving. These luxurious squares layer velvety peanut butter base with rich chocolate topping to create a guilt-free indulgence reminiscent of your favorite candy bars. The perfect balance of healthy fats, moderate protein, and minimal carbs makes these treats ideal for anyone following ketogenic eating patterns without sacrificing dessert enjoyment.
I prepared these bars for a neighborhood gathering last month where several guests followed keto eating patterns. The most satisfying moment came when a guest who typically avoids "diet desserts" requested the recipe after his third square. He couldn't believe they contained no refined sugar and fit perfectly within his macronutrient goals.
Keto-Friendly Ingredients
- Natural Peanut Butter: Forms the creamy foundation with perfect fat-to-protein ratio. Select varieties containing only peanuts and salt without added oils or sweeteners for optimal keto macros.
- Virgin Coconut Oil: Creates ideal texture while adding beneficial MCTs. Unrefined versions provide subtle coconut undertones that complement the peanut butter beautifully.
- Superfine Almond Flour: Adds structure without excessive carbs. Blanched varieties provide the smoothest texture and neutral flavor profile.
- Coconut Flour: Absorbs moisture and creates perfect density. This specialized flour requires precise measurement as it expands significantly when combined with liquids.
- Powdered Erythritol: Provides sweetness without insulin response. This particular sweetener measures similarly to sugar while avoiding the cooling effect of some alternatives.
- Pure Vanilla Extract: Enhances flavor depth without adding carbs. Real extract rather than artificial flavoring creates noticeable improvement in the final taste.
- Sugar-Free Chocolate Chips: Creates luscious topping with authentic chocolate taste. Look for varieties sweetened with stevia or monk fruit rather than maltitol for better digestive tolerance.
Perfect Preparation Method
- Proper Pan Preparation:
- Begin by selecting an 8×8 inch baking pan with straight sides for even squares. Cut parchment paper to create handles extending beyond two opposing sides. Press parchment firmly into corners and smooth against all surfaces. This preparation ensures easy removal and perfect cutting later.
- Base Mixture Creation:
- Combine creamy natural peanut butter with 2 tablespoons coconut oil in a microwave-safe bowl. Heat in 30-second increments, stirring between each interval until completely smooth and fully incorporated. The mixture should appear glossy and flow easily when stirred but not become excessively hot.
- Dry Ingredient Integration:
- Add almond flour, coconut flour, powdered erythritol, and vanilla extract to the warm peanut butter mixture. Stir thoroughly until completely combined with no dry pockets remaining. The resulting dough should hold together when pressed between your fingers without being overly sticky or crumbly.
- Perfect Base Layer Formation:
- Transfer the peanut butter mixture into the prepared pan using a silicone spatula to scrape the bowl clean. Press the mixture firmly and evenly across the bottom of the pan, creating a smooth, level surface. Use the bottom of a measuring cup or glass to apply even pressure, paying special attention to corners and edges.
- Initial Setting Process:
- Place the pan in the refrigerator for precisely 10 minutes to allow the base layer to firm slightly before adding the chocolate topping. This brief chilling period prevents the layers from mixing while maintaining proper adhesion between them.
- Chocolate Topping Development:
- While the base chills, combine sugar-free chocolate chips with the remaining 2 tablespoons coconut oil in a microwave-safe bowl. Heat in 30-second intervals, stirring thoroughly between each until completely melted and silky smooth. Be careful not to overheat, which can cause the chocolate to seize or separate.
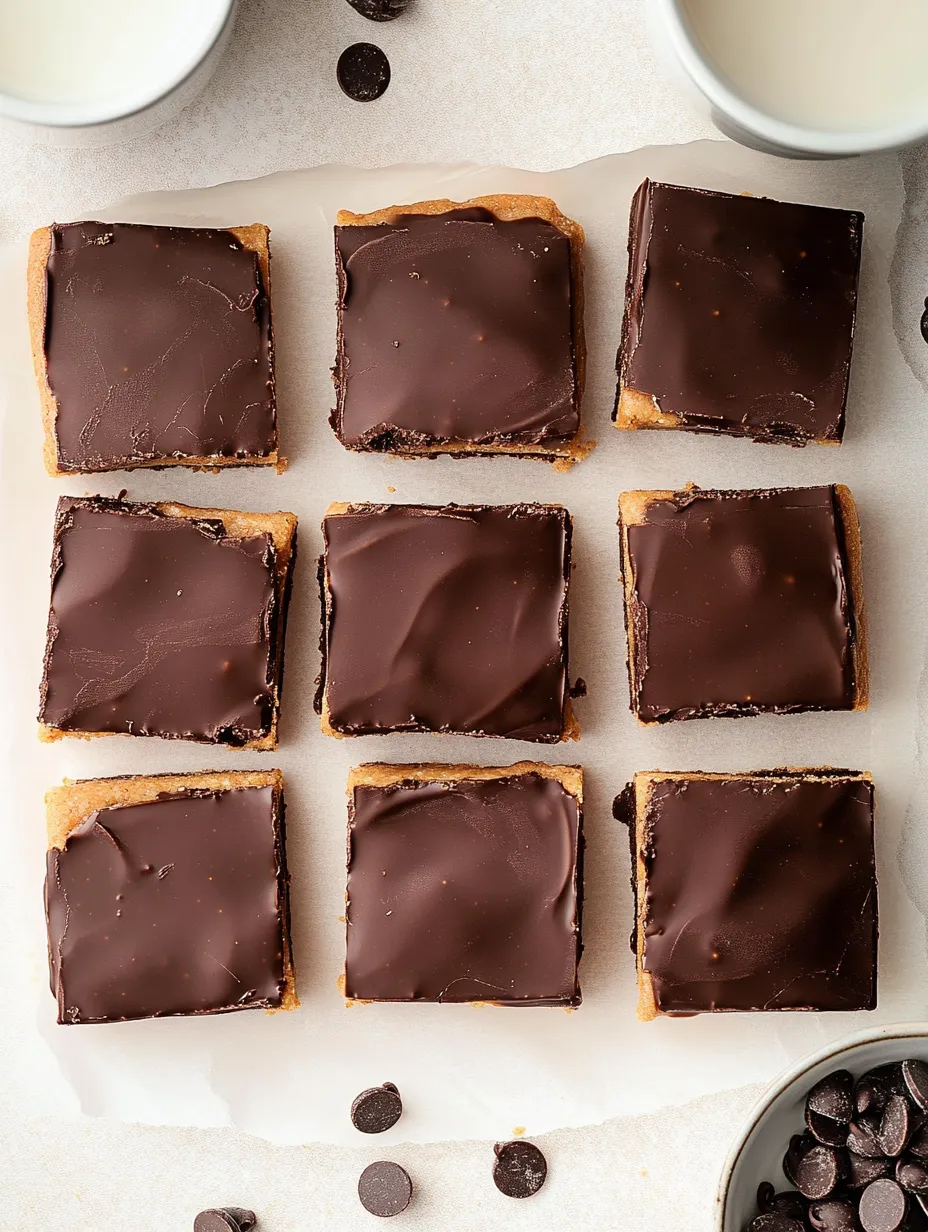
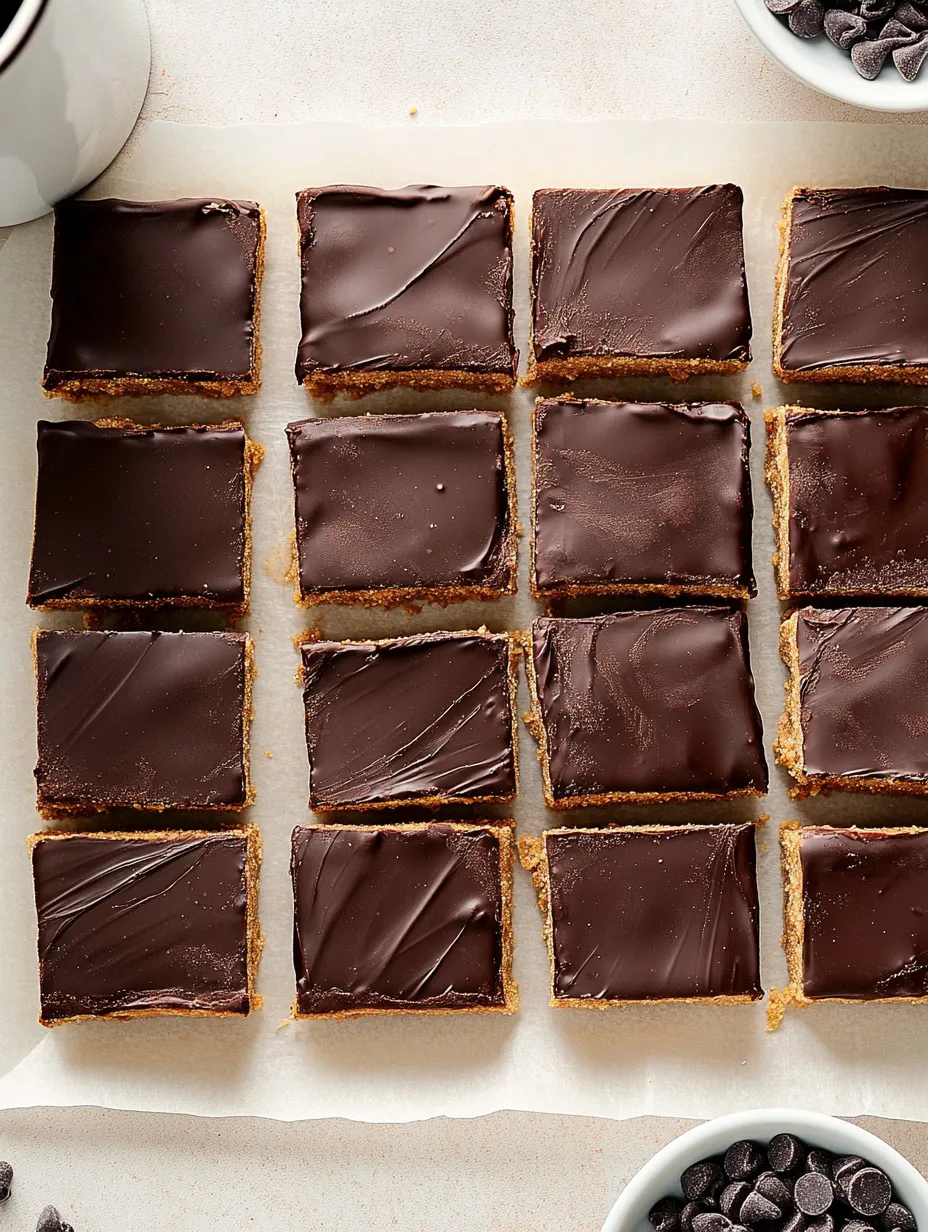
- Final Assembly Technique:
- Remove the chilled base from the refrigerator and pour the melted chocolate mixture evenly across the top. Tilt the pan gently in all directions to help the chocolate spread naturally into an even layer. Use an offset spatula or the back of a spoon to smooth the surface if needed.
- Complete Setting Process:
- Return the assembled bars to the refrigerator and allow them to set undisturbed for a minimum of 2 hours until completely firm. For optimal texture and clean cutting, overnight refrigeration yields the best results as flavors meld and textures fully develop.
My journey with keto baking began three years ago when my husband received surprising blood work results requiring immediate dietary changes. Traditional desserts were his greatest weakness, particularly peanut butter cups. After multiple experiments with alternative ingredients, these bars became our breakthrough moment—proof that eating keto doesn't mean sacrificing favorite flavors.
The science behind these bars involves understanding how traditional carbohydrates function in recipes and finding suitable alternatives. Almond and coconut flours replace wheat flour, providing structure without starch. Erythritol creates sweetness without affecting blood glucose levels because our bodies cannot metabolize it for energy like sugar.
Elegant Presentation Options
Transform these simple bars into impressive dessert features with thoughtful presentation techniques. Create beautiful gift packages by wrapping individual squares in parchment paper tied with natural twine for homemade presents. Develop striking dessert plates by placing diagonal-cut triangles alongside fresh berries and a dollop of unsweetened whipped cream. Consider drizzling with sugar-free chocolate sauce in artistic patterns for dinner party presentations. Arrange on tiered serving platters interspersed with fresh mint leaves for elegant buffet displays. Serve alongside freshly brewed coffee with a side of whipped cream sprinkled with cinnamon for coffee shop experience at home.
Creative Recipe Variations
- Chocolate Swirl Variations: Reserve some melted chocolate to marble through the peanut butter layer.
- Nutty Texture: Incorporate chopped macadamia nuts or pecans into the base mixture.
- Aromatic Warmth: Add half teaspoon cinnamon to the peanut butter mixture.
- Vanilla Bean Enhancement: Use scraped vanilla pod instead of extract for more pronounced flavor.
- Mocha Versions: Add one tablespoon espresso powder to the chocolate layer.
Storage Strategies
- Refrigeration: Store refrigerated in airtight container between layers of parchment paper for up to one week for everyday enjoyment.
- Freezing: Freeze individually wrapped squares in freezer-safe container for up to three months for long-term storage.
- Thawing: Allow frozen bars to thaw in refrigerator for two hours before serving for best texture.
- Vacuum Sealing: Consider vacuum sealing individual portions for travel or meal prep convenience.
- Room Temperature: Keep at cool room temperature for no more than two hours during service to prevent melting while maintaining perfect consistency.
I discovered the perfect ratio of ingredients after multiple testing rounds seeking that elusive balance between indulgence and nutrition. My family served as willing taste-testers, with my teenage son requesting them for his lunch box despite typically rejecting "diet food." The greatest compliment came when my mother-in-law, a traditional baker skeptical of keto alternatives, requested the recipe after our holiday gathering. These bars have become my signature contribution to neighborhood potlucks, where they're enjoyed by everyone regardless of dietary preferences.
Frequently Asked Questions
- → What brand of peanut butter works best for this recipe?
- Look for a natural creamy peanut butter with no added sugar. Make sure to check the label for hidden carbs. Brands like Adams, Smucker's Natural, or any store brand that only contains peanuts and salt will work great.
- → Can I substitute the erythritol with another sweetener?
- Yes! You can use monk fruit sweetener, allulose, or swerve in equal amounts. Just make sure it's in powdered form or the bars might have a grainy texture.
- → Why do my bars crumble when I cut them?
- This usually happens if they're too cold. Let them sit at room temperature for about 10 minutes before cutting. Also, be sure to use a sharp knife and wipe it clean between cuts.
- → Can I add other flavors to these bars?
- Definitely! Try adding a teaspoon of cinnamon to the peanut butter layer, or mix in some chopped sugar-free chocolate chips. You can also sprinkle some flaky sea salt on the chocolate layer before it sets.
- → How do I know if these bars are truly keto-friendly?
- Each square contains approximately 9g total carbs minus 1g fiber, giving you 8g net carbs per serving. This fits within most keto diet plans when consumed as an occasional treat.
- → Do I need to keep these refrigerated?
- Yes, these bars will get soft at room temperature because of the coconut oil. Store them in the refrigerator for up to a week or freeze for up to 3 months in an airtight container.