
 Pin it
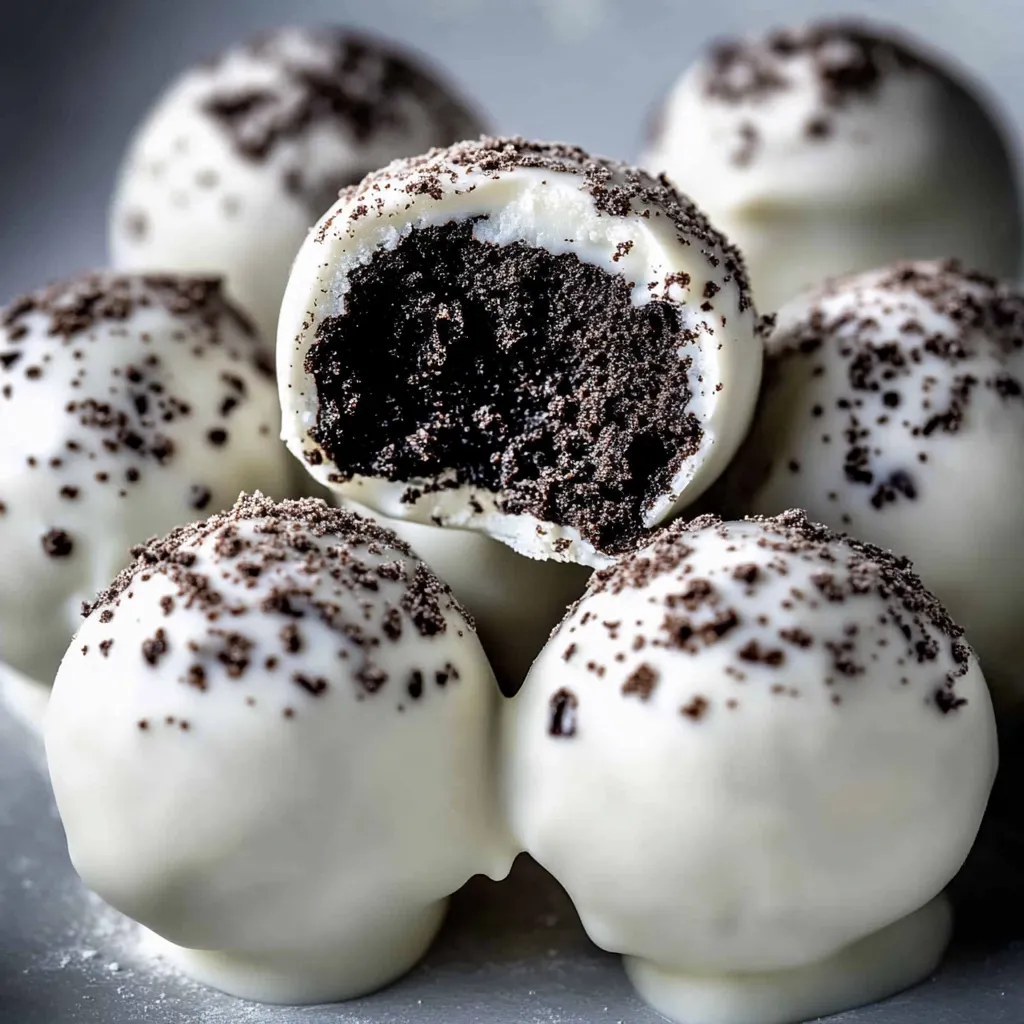
This hearty Oreo Cake Balls recipe has become my go-to treat for potlucks and family gatherings. The combination of creamy Oreo cake insides with a hard candy shell creates an irresistible bite-sized dessert that disappears within minutes whenever I serve them.
I first made these for my daughter's birthday party when I was short on time, and they were such a hit that they've become our family's most-requested treat for celebrations. Even my husband, who isn't a big sweets person, can't resist grabbing a couple when I make a batch.
Ingredients
- 24 Oreos: provides the perfect chocolate cookie base and signature flavor
- 4 oz softened cream cheese: creates that moist, fudgy interior texture that makes these irresistible
- 10 oz white candy melts: Ghirardelli brand works beautifully without thinning
- 2 tbsp heavy cream: optional for thinning candy melts if needed
- Optional decorations: crushed Oreos or melted chocolate for an extra special touch
Step-by-Step Instructions
- Process the Oreos:
- Add all 24 Oreos to your food processor and pulse at high speed until they reach a coarse powder consistency. This usually takes about 30 seconds of pulsing. Make sure no large chunks remain as this will affect the texture of your cake balls.
- Mix in the cream cheese:
- Add the softened cream cheese to your food processor with the crushed Oreos. Pulse again until completely combined into a smooth, uniform texture. The mixture should be slightly sticky but firm enough to hold a shape when rolled. If it seems too dry, you can add a bit more cream cheese.
- Shape the cake balls:
- Remove the food processor blade, being careful to scrape any mixture back into the bowl. Using a medium cookie scoop, portion out the mixture onto a parchment-lined baking sheet. Roll each portion between your palms to create smooth, even balls. Place them back on the parchment paper and freeze for 15 minutes to firm up.
- Prepare the candy coating:
- While the cake balls chill, melt your white candy melts in a microwave-safe bowl. Heat in 20-second intervals, stirring between each until completely smooth. If using Ghirardelli brand, you likely won't need to thin the mixture, but if using another brand that seems too thick, add hot heavy cream one teaspoon at a time.
- Dip and coat the cake balls:
- Remove your chilled cake balls from the freezer. Using a fork, dip each ball into the melted candy coating, ensuring it gets completely covered. Tap the fork gently against the bowl to remove excess coating, then transfer to a parchment-lined baking sheet. Allow the coating to set completely before serving or decorating.
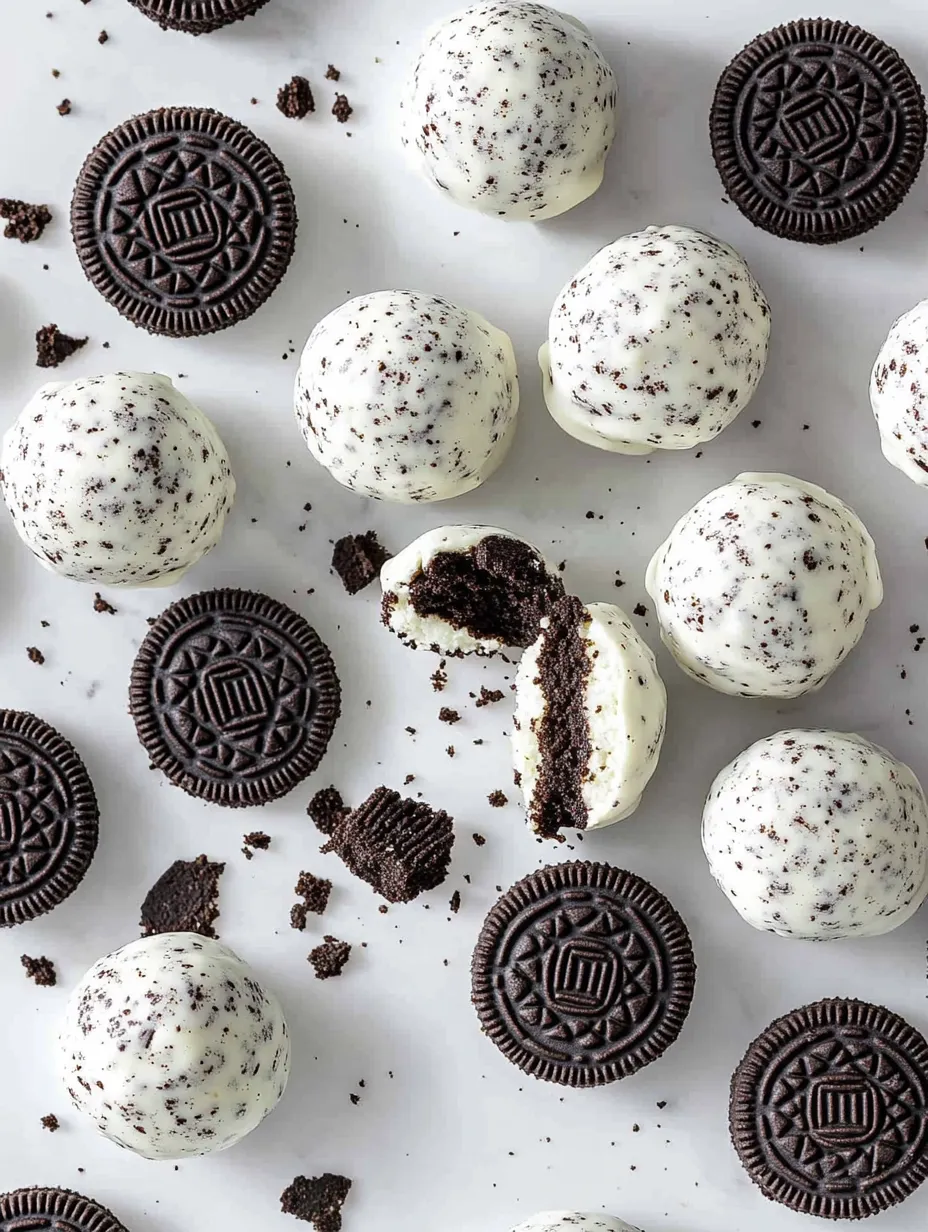
My favorite part of making these cake balls is watching people's reactions when they take their first bite. The contrast between the smooth coating and that incredibly fudgy interior gets them every time. I've even converted several "I don't like Oreos" friends with this recipe!
Storage Tips
These Oreo cake balls will stay fresh in an airtight container in the refrigerator for up to a week. I like to place them in a single layer with parchment paper between layers if stacking is necessary. The cool temperature helps maintain that perfect texture contrast between the outer shell and fudgy interior.
For longer storage, these cake balls freeze beautifully for up to three months. Just place them on a baking sheet until completely frozen, then transfer to a freezer bag. Thaw in the refrigerator overnight before serving. The texture remains nearly identical to freshly made ones.
Flavor Variations
While classic Oreos create a delicious traditional cake ball, don't be afraid to experiment with different Oreo flavors. I've made these with mint Oreos during the holidays, adding a drop of peppermint extract to the cream cheese mixture for an extra festive touch. Golden Oreos paired with white chocolate coating and rainbow sprinkles make perfect birthday treats.
For chocolate lovers, try dipping in milk or dark chocolate instead of white candy melts. You can even add a tablespoon of peanut butter to the Oreo mixture for a chocolate-peanut butter variation that tastes similar to a popular candy cup. The possibilities are endless!
Make Ahead Tips
These Oreo cake balls are perfect for preparing in advance for parties or events. You can make the mixture and shape the balls up to a month ahead, freezing them uncoated on a baking sheet, then transferring to a freezer bag once solid. When ready to serve, simply thaw in the refrigerator for a few hours, then dip in the candy coating.
If making just a day or two ahead, you can complete the entire recipe and store the finished cake balls in the refrigerator. This actually allows the flavors to meld together beautifully. I find they taste even better on day two!
Frequently Asked Questions
- → What are Oreo Cake Balls?
Oreo Cake Balls are bite-sized desserts made from crushed Oreos, cream cheese, and a candy coating for a creamy, flavorful treat.
- → Can I use chocolate chips instead of candy melts?
Yes, but note that chocolate chips melt differently. Warm them carefully to avoid scorching.
- → How do I crush Oreos without a food processor?
Place the Oreos in a ziplock bag and crush them with a rolling pin until they form a powdery texture.
- → How can I decorate Oreo Cake Balls?
Decorate with crushed Oreos, chocolate drizzles, or colors of candy melts to suit your theme.
- → How do I store Oreo Cake Balls?
Store in an airtight container in the fridge for up to a week, or freeze them for longer storage.
- → Do I need to thin the candy melts?
If the candy melts are too thick, you can thin them using a small amount of warm cream or dipping aid chips.