
 Pin it
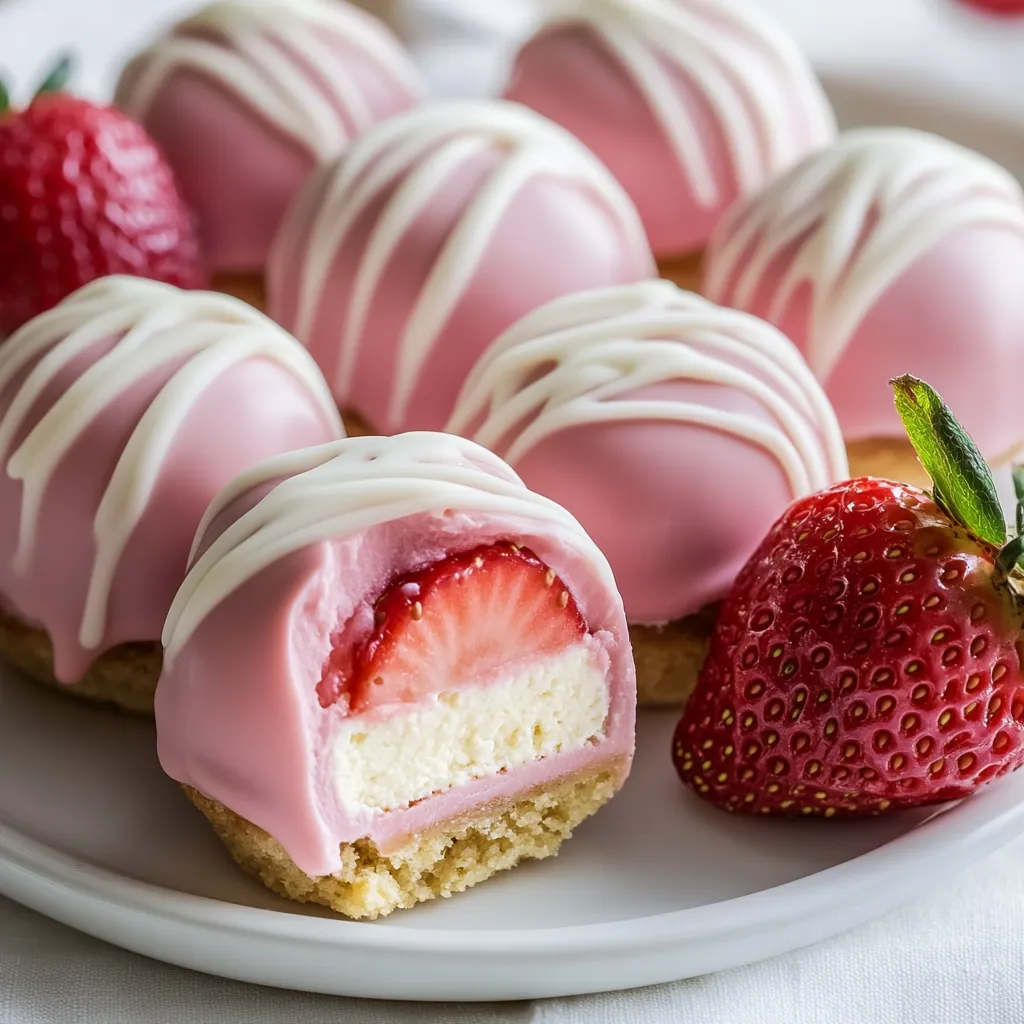
This strawberry cheesecake bite recipe transforms ordinary strawberries into elegant, bite-sized desserts perfect for celebrating spring's arrival. The creamy cheesecake filling paired with fresh strawberries creates a balanced treat that looks impressive despite being remarkably simple to make.
I first made these for a spring equinox celebration at my home, and they've become my signature dessert for every gathering from March through summer. The way my guests' faces light up when they see these berry jewels makes the preparation truly worthwhile.
Ingredients
- Fresh strawberries: Choose large, firm berries with vibrant red color and green caps for the best presentation and flavor
- Cream cheese: Select full-fat cream cheese for the richest texture, ensuring it's fully softened for smooth filling
- Powdered sugar: Provides sweetness without the graininess of granulated sugar, creating a silky smooth filling
- Vanilla extract: Pure extract offers the best flavor profile, enhancing the creaminess of the filling
- Graham cracker crumbs: Adds that classic cheesecake crust texture and flavor in every bite
- White chocolate chips: Optional but creates a beautiful finishing touch and adds a sweet counterpoint to the tangy filling
Step-by-Step Instructions
- Prepare the Strawberries:
- Carefully wash strawberries under cold running water, then pat completely dry with paper towels. Using a small paring knife, cut around the stem at an angle to remove the hull. Then scoop out the center with a melon baller or small measuring spoon, creating a hollow cavity while leaving the walls intact. The larger and more uniform your strawberries, the easier this process will be.
- Make the Cheesecake Filling:
- Place room temperature cream cheese in a medium bowl and beat with an electric mixer for 2-3 minutes until completely smooth and fluffy. This step is crucial for preventing lumps in your filling. Add the powdered sugar gradually while mixing at low speed to avoid a sugar cloud. Pour in the vanilla extract and continue beating until the mixture is silky and holds soft peaks when you lift the beater.
- Fill the Strawberries:
- Transfer your cheesecake filling to a piping bag fitted with a star tip for decorative presentation, or simply use a zip-top bag with a corner snipped off for a more rustic look. Hold each strawberry between your fingers and pipe the filling from the bottom of the cavity upward, creating a small mound that rises just above the top of the strawberry. Work slowly to avoid air pockets in the filling.
- Add the Graham Cracker Crumbs:
- Place graham cracker crumbs in a shallow dish. Gently press just the filled portion of each strawberry into the crumbs, rolling slightly to ensure even coverage. The moisture from the filling will help the crumbs adhere. Shake off any excess crumbs before placing on your serving platter.
- Optional Chocolate Drizzle:
- Melt white chocolate chips in a microwave-safe bowl, working in 30-second intervals and stirring thoroughly between each interval to prevent scorching. Once completely smooth, transfer to a small zip-top bag and snip a tiny corner. Hold the bag about 4 inches above the strawberries and move quickly back and forth to create delicate decorative lines across each berry.
- Chill and Serve:
- Arrange your completed strawberry cheesecake bites on a serving platter with space between each berry. Refrigerate for at least 30 minutes to allow the filling to firm up slightly. This chilling time also helps the flavors meld together beautifully.
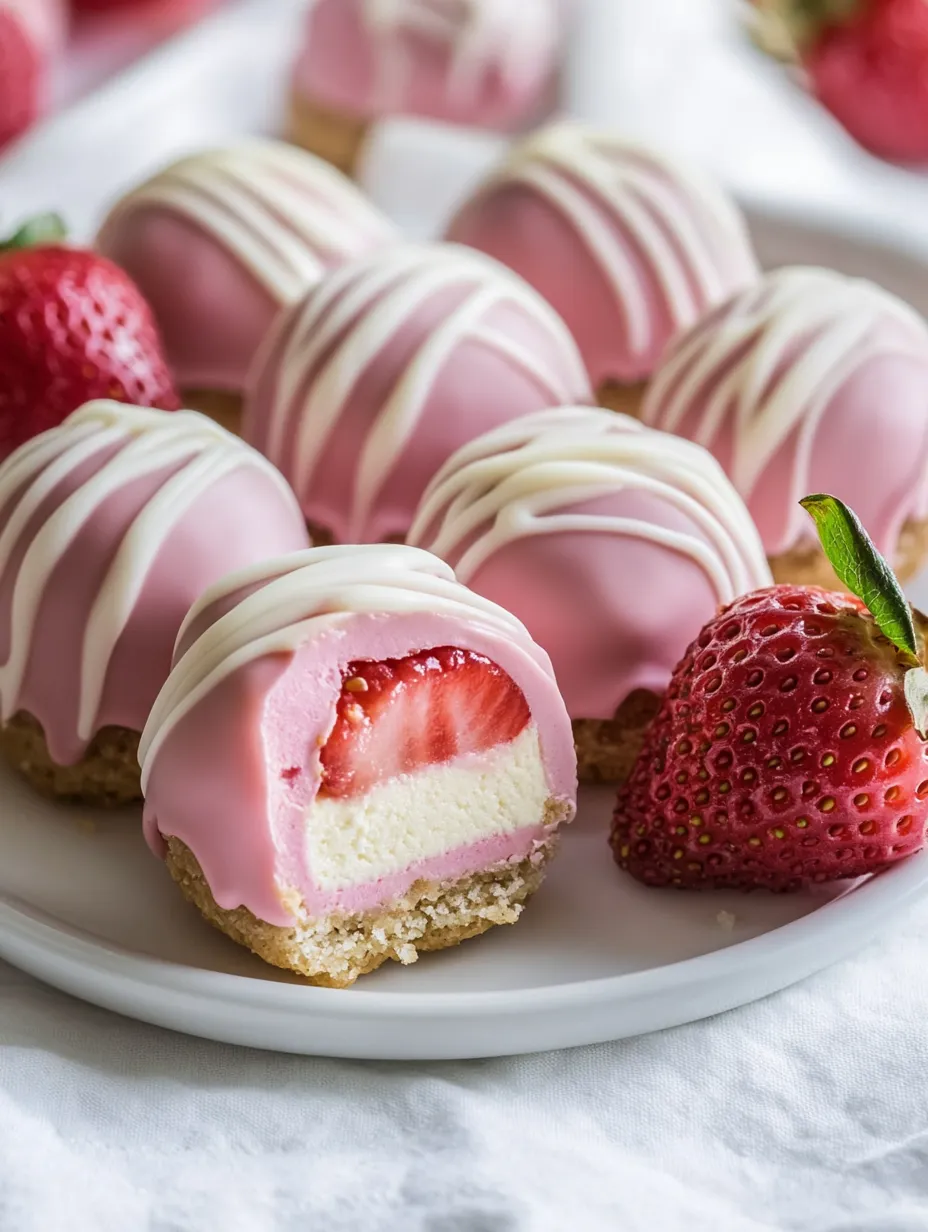
The graham cracker crumbs are what truly transform these from stuffed strawberries into authentic cheesecake bites. My grandmother taught me that this simple touch makes all the difference, mimicking that perfect contrast between crust and filling that makes traditional cheesecake so satisfying.
Make-Ahead Tips
These cheesecake bites can be prepared up to 8 hours in advance of serving. Prepare everything except the graham cracker coating and chocolate drizzle. Store the filled strawberries in an airtight container in the refrigerator, then finish with the crumbs and chocolate just before serving for the freshest presentation.
The filling can be made up to 2 days ahead and stored in a piping bag in the refrigerator. Let it come to room temperature for about 15 minutes before piping for easier handling. This makes assembly incredibly quick when you're ready to serve.
Customization Ideas
For a chocolate lover's version, swap the white chocolate drizzle for dark or milk chocolate. You can even mix mini chocolate chips into the filling for extra indulgence and texture contrast against the smooth cream cheese.
Create seasonal variations by adding different extracts to the filling. Try almond extract for a sophisticated flavor profile, or lemon zest for a brighter, more citrusy note that complements the strawberries beautifully.
Serving Suggestions
Display these beautiful bites on a tiered cake stand for an elegant presentation at bridal showers or spring tea parties. The vertical display makes them easy for guests to grab and showcases their beautiful appearance.
Pair with glasses of prosecco or champagne for a celebratory touch. The bubbles cut through the richness of the cheesecake filling while complementing the sweetness of the strawberries, creating a perfect flavor balance.
Frequently Asked Questions
- → How can I hollow the strawberries easily?
Use a paring knife or a melon baller to carefully scoop out the center of each strawberry without damaging the sides.
- → Can I make the filling ahead of time?
Yes, you can prepare the cheesecake filling a day ahead and store it in the refrigerator in an airtight container. Stir before use.
- → What can I use instead of graham cracker crumbs?
You can substitute graham cracker crumbs with finely crushed digestive biscuits, cookie crumbs, or even ground nuts for a variation.
- → Can these bites be stored, and for how long?
Strawberry cheesecake bites are best enjoyed fresh, but they can be stored in the refrigerator for up to 2 days in an airtight container.
- → Is there a way to make the filling more stable in warm weather?
Yes, dissolve 1 teaspoon of unflavored gelatin in a small amount of hot water and mix it into the filling to help it hold its shape better in warm conditions.